Quantcast
Channel: GRAPHISOFT Help Center
Viewing all 1140 articles
Browse latest View live

BIMcloud Troubleshooting Guide

$
0
0

BIMcloud Server Module cannot be started

Issue

The BIMcloud Server Module is stopped and cannot be started any more. The BIMcloud Manager is still accessible from ARCHICAD and from a browser as well.

From version 19: although, the BIMcloud Control Icon shows that the Server Module is running, but the Manager’s web-interface shows that it is stopped.

Cause

Most probably the BlobCache database is damaged. An unclean shutdown or if the hard drive is running out of free space can cause this issue.

Solution

The BlobCache database must be deleted:

  1. Make sure to have enough free space in the hard drive where the BIMcloud Server is installed. If projects and attachments are stored on a different drive, make sure to have enough free space there as well.
  2. Stop the BIMcloud Server Module’s service.
  3. Go to the following folder:
    • C:\Program Files\GRAPHISOFT\BIMcloud\BIMcloud Server <version>\ on Windows
    • /Applications/GRAPHISOFT/BIMcloud/BIMcloud Server <version>/ on OS X
  4. Delete the BlobCache folder.
  5. Start the BIM Server Module’s service.

After the deletion the BIMcloud Server will automatically create a new database.


Artlantis Troubleshooting Guide

$
0
0

Known Issues

New Artlantis Render/Studio 6 export plug-in (released with ARCHICAD 18 Update 8004) does not install properly on Windows

Issue

The ARCHICAD 18 update 8004 installs the newly available Artlantis Render/Studio 6 export plug-in to a wrong location on Windows Operating Systems due to an error.

Solution

The solution is to download the plug in from GRAHISOFT.com add-on site, and manually copy the necessary .apx and .dll files to the corresponding locations in the updated ARCHICAD 18 folder.

Place the CAtl6_64.dll file to the GRAPHISOFT/ARCHICAD 18 root folder and the ArtlantisRender-Studio_6_Out.apx file to the GRAPHISOFT/ARCHICAD 18/Add-Ons/Import-Export folder. See the screenshots about the locations below.

artlantis output addon dll

artlantis output addon apx


XLSX export from ARCHICAD can result in corrupt files

$
0
0

Issue

If the Energy Evaluation Report is exported using the default .xlsx file format it becomes corrupted under certain circumstances. Files of the same format can also be corrupted when saved from an Interactive Schedule.

export


save as xlsx


The circumstances of this kind of file corruption are the following:

  • The operating system is Windows,
  • The decimal symbol is set to “,” (comma) instead of “.” (dot) at Control Panel -> Region -> Additional Settings -> Numbers tab either by the user or by default. This is the default setting of Windows in some languages.
  • ARCHICAD 19 is updated to build 5005.

When opening the exported file in Excel, it gives a warning:

error message

After clicking on ‘Yes’ Excel will try to recover the file and will open it giving this message:

repair

Cause

Due to a bug decimals of non-integer values are cut off if the decimal symbol is “,” (comma) in the given language instead of “.” (dot). These decimals are substituted by zeros, so only integers will appear in the resulting file in Excel.


Solution

This bug is planned to be fixed in the next regular update of ARCHICAD 19.

Workaround #1

  • Set the decimal symbol to “.” from “,” at Control Panel -> Region -> Additional Settings -> Numbers tab

Windows_Region_Additional_Settings2

Workaround #2 only in Eco Designer Star

  • Use file format .xls (Excel 97-2003 Workbook)


Summary

Files of which format will be corrupted depending on where they were saved from:

saved as xlsx saved as xls
Interactive Schedule corrupted corrupted
Energy Evaluation Report corrupted OK
PHPP OK


Calculation/Schedule – Troubleshooting Guide

$
0
0

What is the difference between the component skin area and surface area?

  • For the skin area we can say this means what we buy in square meter. (e.g. insulation).
  • It is a projected area, doesn’t exist in reality.
  • Doesn’t depend on visibility settings.

You can find the detailed description on how each Basic and Composite Element types  is calculated here.

  • Surfaces area can be used for calculating the area of the facade, for painting, for cleaning, exposition to sunlight, air or water etc. It is based on the surface material and the building material attribute.
  • As any quantity in the IS visibility settings will not take an effect on it’s value, you have to setup the criteria of the schedule according to the preferred visibility. E.g the actual view’s Layers and the newly introduced Layer combination criteria. In case of the exposed surface value, you need to use the Layer combination criteria at this values own settings to have the prefferred visibility model that you want to schedule.

See more info on Surface schedules at: the ‘Create Schedule of Surfaces’ section or at the ‘Schedule of Finishes’ section.

Important notes for both areas:

  • Do not work in Legacy mode (PBC only) link.
  • The „Old” listing doesn’t work.
  • It doesn’t work for GDL scripting or ODBC
  • Membranes/zero skins are not supported because it is against the BIM rule: you have to set at least 0.01mm for a skin width.
  • For thin elements: both sides will be considered.
  • No visual feedback on considered surfaces in Schedules, so you have to set up the layers there also.
  • Airspace is considered as a building material.
  • Layer Combination is a MUST HAVE.
  • Exposed area setup: this is a new item from ARCHICAD 19 on, the first field that has a setup.

Area (by story) for Morph elements is not listed properly

{i} Note: Fixed in ARCHICAD 19 Update Build 5005.

Issue

Area (by story) for Morph elements doesn’t show the proper results in Element list.

Solution

This issue will be fixed in the upcoming ARCHICAD 19 update.

Why do I get incorrect results for my complex profiled wall surface schedule?

Issue

You want to calculate the surface of your complex profiled wall but don’t get the expected result.

Solution

the followings should be checked:

  • If the needed component surface of your Complex profile doesn’t appear, you have to select the appropriate component in the Profile Manager and enable the List Component Area by checkbox. (Also if you don’t want to list a component e.g. :Air space you have to uncheck it)
  • If the surface that you want to calculate is not parallel to the base line of your profile, you have to rotate the base line

You can find the description of this function more detailed here.


Where can I find the Available parameters for Scheduling Fields?

Issue

It is possible that you don’t find the Additional Parameters for setting the needed fields in your schedule. The dialog that lists all parameters that can be used as fields for the schedule.

Cause

This part has changed in ARCHICAD 19

Solution

Click the Add button to access the Available Parameters dialog.

You can find the description of this function more detailed here.


How to set the Exposed area correctly?

  • You can set exposed area by clicking in this little box with three dots on.

  • All elements have to be listed that are considered to cover surfaces.
  • Layer combination has to be set first, because the layer combination set at the views doesn’t count here!


The exposed surface is more than expected in the Surface schedule.

Issue

The exposed area contains the reveal of the openings as well, but it is not correct based on GER or AUT norms.
Extra surfaces are coming from the area above the frame, and returning areas of the reveal (see yellow contours on the picture)

Solution

In ARCHICAD 19 it is calculated this way, it is not possible to set criteria for top/bottom/edge/end/inside/outside surfaces.
As a workaround you have to set the openings so that it has no reveal. And make the calculation based on that model.

Our development is working on a solution for the future releases.


Incorrect results in the surface schedules if the composite of a wall is changed

Issue

If the composite of a wall is changed in the Interactive Surface Schedule to another composite which has fewer layers, empty lines are created.

Surface schedule before composite change

Surface schedule after composite change


Solution

Workaround: Change the composites from the settings dialog of the walls, or after changing in the Interactive Schedule, refresh the list (CTRL-SHIFT-ALT-R on windows,CMD-SHIFT-ALT-R on Mac).


Surface Schedule displays the name of the Renovation Override surface

Issue

If you open a Surface Schedule, it displays the Renovation Override Surface’s name and color, instead of the element’s actual surface’s.

Cause

Schedules usually have a different Renovation Filter applied. If the Renovation Filter of the Schedule has an override, it will display that override surface in 3D, and so ARCHICAD will use that surface during scheduling.

Solution

After opening the schedule, change the Renovation Filter to one without Renovation Overrides. We plan to fix this issue with the next regular update of ARCHICAD 19.


Wall Area Calculation in ArchiCAD17 with PBC

Issue and Cause

With Priority Based Connections in ArchiCAD 17, the calculation of wall areas has changed.

  • AC16


  • Up to AC16, an L shaped connection created a 45 degree mitered joint at the corner. This resulted in the two outside surface areas to be equal.

troubleshooting-wallareacalcmethod17--2


  • In AC17, in an L shaped connection one wall will be prioritized over the other (more similar to a real life building environment) and the edge of the wall is not counted into the areas. Thus the wall areas are unequal and seem erroneous.


Solution

  • Through the development of a design, a thin layer of paint can be applied to the composite material, thus the area calculations will be accurate. As in the image above, the thin edge area is small and insignificant in the calculations.

troubleshooting-wallareacalcmethod17--3


There are 2 important points to consider:

  • The decimals have to be set to 1 in the “Project Preferences”
  • The minimum layer thickness for the calculations to work is 0.1mm.

troubleshooting-wallareacalcmethod17--5

How to get back the old legacy intersection and Surface methods for model elements (as in ARCHICAD 16 and before)

Issue

Sometimes it can come up that you want to use the old functionality: The Legacy Surface method means that Surfaces are set only at the element level (they do not come from Building Materials, which were introduced in ARCHICAD 17) – except in the case of Profile elements.

Solution

To access this functionality, go to Options > Project Preferences > Legacy.
Check the Use legacy intersection and Surface methods for model elements

However if you enable Legacy Intersection mode, the following ARCHICAD features (new features in ARCHICAD 19) are NOT available:

    • Surface Painter
    • Surface Schedules

At Info button you can see how these old legacy intersections work:

Old Listing Unsaved Zone Component List

Issue

Old Listing: In case of Set Up List Schemes / Duplicate or Create new a “Cannot write Output File. Write Permisson Error” message appears and the save fails.

Cause

There are two possible scenarios, both presenting problems.

* If editing a list scheme that is loaded in the library, the new list is attempted to be added to this file.

        • .lis or listset.txt files are placed in the Program Files, where Ac does not have overwriting permissions, thus the overwrite fails. If the files are moved elsewhere on the computer, the problem does not persist.

* if there is no loaded list scheme (we are editing a default file) a default listset.txt is created in the embedded library and the new list is added to this one.

        • The error message does not come when the first listset.txt is created. When the file is reopened however and the scheme is edited the same error message comes as in the first case scenario.

Solution

        • Create a folder outside of the Program Files Folder
        • Set Up List Schemes / Duplicate or Create new
        • Choose the created folder to save the files into
        • If the “Cannot write Output File. Write Permisson Errors” message comes up, disregard it
        • Load the folder as a linked library in the Library Manager
        • Open the Set Up List Scheme dialogue
        • The desired list can be dragged into the new set
        • Hit ok
        • If the “Cannot write Output File. Write Permisson Errors” message comes up, disregard it, the message will not appear again with the newly created file.

{i} Note: GRAPHISOFT has fixed this issue in an ArchiCAD 17 Hotfix.

Fire Rating Listing Parameter

In the Door and Window setting you have two options to show the Feuerfestigkeit and Feuerwiederstand. In the schedule the prefix will not be visible.


011.jpg

11.jpg

If you wish to see both parameter in one filed, there is a listing parameter called: AC_? MarkerText _5.


003.jpg

If you add this parameter to the list, you will see number with prefix in the schedule.


04.jpg


Unexpected Labeling/Scheduling of Openings on Floors Offset from Project’s Story Settings

Issue

Sometimes a region of a building needs to be offset vertically from a standard floor. This happens commonly with a split floor, or when an architectural job consists of two or more towers/buildings.

Labels for doors residing on these offset floors might not produce expected results. Door/Window schedules might not group elements in the correct zone or floor for elements in these offset floors.

Cause

Prior to Hotfix 4 of ArchiCAD 15 openings, such as doors and windows, determined the floor they belonged to by geometry alone. That is, the opening’s height was compared against the story settings. The opening’s geometric center determined the floor it belonged to.

Below is a simplified example of the old behavior using two 2-story blocks. The one to the right is offset lower than the defined story settings. The top most walls are on story 2.

wallheight1n2_80.png

But the opening on the lower block has determined that it is one story lower on floor 1 instead of floor 2.

doorOnStory1n2_80.png

The rule describing the story the opening belongs to becomes more clear when we look at an elevation.

StoryElevaton_80.png

This behavior can pose problems for labeling and scheduling. Below I have used a dimension marker I modified to show the zone that the door belongs to. The expectation of the user most likely is that both doors should return “Ground Zone” as the zone that they belong to. The building block that is lower than the story setting is actually returning the zone name of the floor below it.

A schedule that groups doors by zone will show one door in “Ground Zone” and one in “Basement Zone.” More than likely this is not the intention of the Architect.

doorWrongZone_80.png

The door determines the zone that it belongs to by examining its floor and what zone borders it. As we saw in the above 3d perspective window the door believes itself to be on Story 1. This is the reason it believes that its associated zone is “Basement Zone” and not “Ground Zone.”

Solution

The solution is for the door to get its floor information from the wall that contains it. If the containing wall has a home story of 2, then the door considers itself to be on floor two.

To coerce this new behavior in ArchiCAD 15 you must add a registry key and also you must make sure your version is at least Hotfix 4 build 3898. Below is an example of what your registry would look like if you were an Australian user.

UseStoryOfSingleStoryWallForOpenings_80.png

{i} HKEY_CURRENT_USER\Software\GRAPHISOFT\ArchiCAD-64\ArchiCAD-64 15.0.0 XXX R1\Modeling Freedom. Where “XXX” is your localization.
The key that needs to be added is UseStoryOfSingleStoryWallForOpenings. This key should be a DWORD and its value should be set to 1.

In ArchiCAD 16 this new behavior is the default mode. If you prefer the older behavior you can create a registry key (DWORD) in the Modeling Freedom folder called “DoNotUseStoryOfSingleStoryWallForOpenings” set it to “1” and the default ArchiCAD 15 rules will be used.

Solution (an important caveat)

The default behavior in ArchiCAD 16 is for an opening to use its containing wall for information about which floor it belongs to. Likewise in ArchiCAD 15, if you have added the registry key mentioned above and set its value to “1”, ArchiCAD 15 will also report opening floor values based on its containing wall’s home story.

Now comes the caveat. A multistory wall has one home story, but the openings within it can span several stories. So it is important to address areas where openings should calculate their relevant story geometrically as was the case before this new behavior was introduced.

Two Floor Plan Display options are important to how an opening’s floor value is determined:

  1. Show on Stories
  2. Floor Plan Display

A multistory wall most likely will have the Floor Plan Display option Show on Stories set to “All Relevant Stories”. This for most cases is the sensible setting. This setting is enough to guarantee that openings will calculate geometrically which floor an opening is placed.

Precisely, if you want the opening to take story information from its containing wall, that is use this new behavior, then you have to use “Home Story Only” for Show on Stories and “Symbolic Cut” for Floor Plan Display.

Here is an example of when the wall’s home story determines the opening story.

HomeStoryOnlySymbolicCut_80.png

Using the same model we can coerce ArchiCAD to use the geometric rule. By changing either or both options the geometric rule will be followed. Indeed with these changes made, ArchiCAD makes it visually clear to the Architect that, given the current story settings, the door does not belong to the ground floor but to the basement.

AllRelevantStories_80.png

Sensibly, the door correctly grabs the expected zone information too.

AllRelevantStoriesBasement_80.png

BIMx Known Issues

$
0
0

Autotexts are the same on every layout in the BIMx hypermodel

Issue

Every Layout’s autotext in the BIMx hypermodel will have the data of the Layout which was exported first if the Autotext is contained in a Drawing placed on the Layout.

Cause

During the saving process of the BIMx hypermodel, ARCHICAD modifies the Autotexts (incorrectly) therefore every Autotext will inherit it’s content from the first Layout. This happens only if the Drawings which contain the Autotexts on the Layouts are Stored in the Project file.

Workaround 1

Place the autotext on the Layout Masters  instead of placing a Drawing on each Layout which contains the Autotexts.

Workaround 2

In the Drawing’s settings dialog the ‘Store Drawing in the Project file’ checkbox have to be unticked for the time of the Publishing.

drawing stored in project


Error when exporting the 3D data to BIMx hypermodel

{i} Fixed in ARCHICAD 19 Update Build 5005

Issue

When exporting (publishing or uploading) a BIMx hypermodel, the publisher may not be able to save the 3D data of the hypermodel.

3d export failed

Cause

The problem is that either the user’s Operating System login name or the publishing path contains double byte characters (eg. japanese, chinese ).

Workaround

The workaround for the problem is to either use an Operating System login name with only latin characters in it and choosing an export path that also contains only latin characters.


Cursor Disappears in BIMx While Saving

{i} Fixed in ARCHICAD 18 Update Build 5100

The mouse and cursor disappears in the Save BIMx Model dialogue box. It is impossible to select the destination of the file in the appropriate field. The keyboard TAB can only switch between the fields “Save As” and “Tags”.

The issue occurs when:

  • opening BIMx from ArchiCAD
  • opening BIMx independently of ArchiCAD.

on OSX 10.10 with BIMx 17 and 18.

You can save your file to the default folder by hitting Enter, then you can move your file to the desired destination.

Workaround: switch to another application by using Command+TAB on your keybord then switch back to BIMx, you will find the cursor reappear.


File upload to the BIMx Model Transfer Site

Uploading BIMx Hyper-model from ArchiCAD

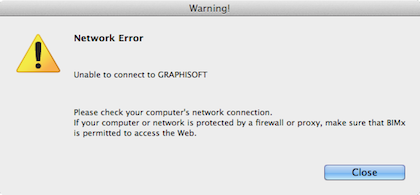
Network Error

network error ArchiCAD couldn’t submit the dongle number and used BIMx account you signed in with to the BIMx Cloud database. This could either be caused by:

  • a connection issue to GRAPHISOFT’s servers from your ArchiCAD client because of network restrictions, or
  • a malfunction at the server side not allowing the ArchiCAD client to join.

If the issue can’t be resolved by adjusting the Firewall/Antivirus software settings please send an email to BIMx Technical Support with the following information:

  • what is the exact issue (uploading from ArchiCAD or from BIMx Desktop, the error message you get)
  • your BIMx email address
  • your keyplug number (green WIBU or silver CodeMeter key)
  • the ArchiCAD Fastlogger files

Uploader is unable to connect to GRAPHISOFT. Can’t access upload location

After publishing the 3D view(s) and layouts of the BIMx Hyper-model, the BIMx Uploader Application can display these errors: uploader is unable to connect to graphisoft cant access upload location_ Such error messages are displayed when the BIMx Uploader app is unable to upload the BIMx file to the chosen upload location. Most probably the chosen location is a Private Folder and the Uploader application doesn’t get permission to upload the file there. Publication to Private folders is only available for Clients with an Active SSA (Software Services Agreement) subscription. If you believe you are on this subscription please report the issue to BIMx Technical Support with the following information:

  • what is the exact issue (uploading from ArchiCAD or from BIMx Desktop, the error message you get)
  • your BIMx email address
  • your keyplug number (green WIBU or silver CodeMeter key)
  • the log files of the BIMx Uploader application.

As a workaround you can try uploading the model publicly, or use an alternative file transfer option for iOS or Android devices.

Uploading BIMx 3D file from BIMx Desktop

Network Error

network error BIMx Desktop couldn’t submit the dongle number and used BIMx account you signed in with to the BIMx Cloud database. This could either be caused by:

  • a connection issue to GRAPHISOFT’s servers from your ArchiCAD client because of network restrictions, or
  • a malfunction at the server side not allowing the ArchiCAD client to join.

If the issue can’t be resolved by adjusting the Firewall/Antivirus software settings please send an email to BIMx Technical Support with the following information:

  • what is the exact issue (uploading from ArchiCAD or from BIMx Desktop, the error message you get)
  • your BIMx email address
  • your keyplug number (green WIBU or silver CodeMeter key)
  • the “BIMx_Log.txt” and “Engine_Log.txt” files from the Users/username/Documents/BIMx folder

Upload to private folder only works with SSA

publication to private folders is only available for customers with SSA Selecting the option Upload to a Private Folder results in this dialogue if you don’t have an Active SSA (Software Services Agreement) subscription, as this premium functionality is only available for them. If you believe you have an Active SSA subscription please report the issue with the Report license problem button.


BIMx 16 doesn’t respond on Yosemite.

BIMx 16 not being usable on Yosemite, no menus or keyboard commands appear, or even scrolling is not possible.

Workaround: left-click the mouse button on the screen (the BIMx model screen) then click Esc, the Esc button now works and so do all the other keys that had been unusable before.


BIMx Desktop App/Viewer

BIMx doesn’t start

If BIMx Desktop version crashes at startup, shows only a black screen, a black screen with red lines or you see other display issues its most possibly related to your Video Card or its Driver. Make sure you have the latest driver installed for your card that supports OpenGL 2.0. In case device manager indicates Generic SVGA driver you should search for a driver written directly for your card.

Here you can find the latest drivers for the popular cards:

{i} Based on our experiences uninstalling the existing driver and installing the latest one usually solves most of the display issues. /!\ Some old graphics cards may not be able to show the model in BIMx even with the latest released driver, these are mostly really old and low performance cards. Many computers with integrated Intel graphics are affected as well.


BIMx crashes at start via Remote Desktop

Running BIMx via Remote Desktop may fail because of the limitations of redirecting the OpenGL technology to the other machine. Read more about this here. BIMx can be started only from a local profile and then joining in via remote session will be able to transfer the image of the running application from that point. It is advised to run BIMx in windowed mode in such cases.


Issue on Mac with virtualised operating systems

Running BIMx may fail in virtualised environments (such as Parallel Desktop/VMware Fusion). In some cases it works but global illumination render fails. {i} Running BIMx in a virtual machine is not recommended because BIMx is using the video card in OpenGL mode. The problem itself might also be related to the ATI Mobility Radeon video cards that are used in Macbook laptops, although this has been seen on a Mac Pro system with a desktop ATI card as well.


File error

File error message pops up if the opened file is damaged or if was saved with a newer version of ArchiCAD than the BIMx Application. error.png


Unsupported BIMx file

BIMx 17 Desktop application can’t open BIMx Hyper-models, these files can be opened with BIMx 18 Desktop app or newer and with the Android and iOS mobile BIMx apps. Unsupported file type


Save and Share to BIMx Model Transfer Site buttons are greyed out

If the BIMx Desktop Application doesn’t find a license it starts in Viewer mode. This result in that the “Save” and “Share BIMx Model” buttons  are greyed as these options are not availabe without a license. save and share greyed out If you have a BIMx license (BIMx license is integrated into the ArchiCAD license from version 17) make sure that it is accessible for BIMx.


alt text

Pixelated shadows

In some cases the shadows might be pixelated. This is usually caused by large polygon number elements, such as trees and other plants. Their detailed shadow fills up the shadow map and this results low-res shadows. A couple of ideas that might help to fix the representation:

  • hide the layer of these elements
  • use the marquee tool to only represent a part of the model
  • use lower polygon number elements

alpha channel transparency

Invisible textures

Textures with alpha channel transparency are invisible in the case they are viewed through another transparent surface.

Mac OS X 10.11 El Capitan

$
0
0

Apple has released MAC OS X 10.11 on the 30th of September, 2015. You can see the list of compatibility of different ARCHICAD versions and the schedule of Compatibilty Updates below.


Compatible ARCHICAD versions

Summary by versions

ARCHICAD 19: Supported Builds: ARCHICAD 19 Update 5005 for all language versions.

ARCHICAD 18: Supported Builds: ARCHICAD 18 Update 8004 for all language versions.

ARCHICAD 19 Solo: Supported Builds: ARCHICAD 19 Solo Update 5007 for INT, UKI, JPN and KOR language versions (available through the Automatic Update System).

ARCHICAD 18 Solo: Supported Builds: ARCHICAD 18 Solo Update 8006 for INT, UKI, JPN and KOR language versions  (available through the Automatic Update System).

ARCHICAD SE2015: Supported Builds: ARCHICAD SE2015 Update 7008 for all language versions.

ARCHICAD SE2016: Supported for all language versions.

ARCHICAD versions 17 and older, 17 SOLO and older, SE 2014 and older: Do NOT upgrade your MAC OS to MAC OS X 10.11. These versions will not be supported on MAC OS 10.11.


Upgrade checklist

  • Study this article for any known issues, difficulties
  • Back up all of your ARCHICAD / BIMcloud / BIM Server specific data before upgrading the operating system
    • Export all BIM Server Projects, Users, Roles in case these backups will be needed
    • Make sure that you have a copy (source folder) of all BIMcloud BIM Server libraries
  • Allow yourself enough time for the upgrade, do not upgrade the OS close to a deadline
  • Install all current operating system updates and ARCHICAD updates prior to the upgrade
  • Upload all Software keys to the License Pool
  • Return all borrowed licenses
  • Upgrade the operating system
  • Install all updates for the new system

If migrating to a new computer please see Transferring data between computers with Apple’s Migration Assistant topic of this article below.


Known issues

Missing drawings and hotlinks

{i} Note: Fixed in ARCHICAD 18 Update Build 8004 and ARCHICAD 19 Update Build 5005.

Affected versions: 19 or older | Severity: workaround applicable

Issue

External drawings and hotlinks – which are stored on a mounted drive – are missing from the project and cannot be relinked or updated (solo and teamwork projects are also affected) if at least one user modifies the affected project with OS X El Capitan. From this point Relink/Update doesn’t work, the external file remains missing. With PMK files ARCHICAD also presents a ‘Cannot open file’ warning message.

Cause

There were significant changes in the mounted drives handling on OS X El Capitan comparing to Yosemite and earlier versions of OS X.

If different operating system users mount the affected network folder and a user places an external drawing or a hotlink from this folder, then other users will experience that these drawings and hotlinks are missing.

Workaround

Use “one dummy user login” to access the file server. The SMB/AFP/CIFS connection to the mounted server should be established with ONE login info. In teamwork all users can use their own account, this is only important for mounting the file server! Note that hotlinks and drawings have to be relinked once the users are all using the same “dummy user login”.

In case of hotlinks, other possible workaround is to use teamwork projects as hotlinks instead of module files.

Can’t select menu items from drop-down menus in ARCHICAD 19 or older

{i} Note: Fixed in ARCHICAD 18 Update Build 7007 and ARCHICAD 19 Update Build 4011. This issue is also fixed in the Temporary Compatibility Update.

Affected versions: 19 or older | Severity: there is no workaround

When you try to select a menu item from a drop-down menu in ARCHICAD, the previous setting stays active. There is no workaround for menus that are only available as drop-down, but if you can find the setting on a different panel, you can use the option from there (for example you can’t set the Renovation status from the default settings panel, but you can apply it from the Renovation Palette).

Textures are missing when you open the 3D window for the second time in ARCHICAD 18

Affected versions: 18 | Severity: workaround applicable

If you close the 3D window (OpenGL, perspective), and open it again, the textures of all surfaces will be missing. The colors will still match, but there won’t be any textures.

Workaround:

You can leave the 3D window open in the background, and the bug won’t happen at all. If it has already happened, you can fix it by changing the 3D Engine to Internal, and then back to OpenGL. You can do that by selecting the 3D Engine from the ‘View>3D View Options’ menu.

Interactive schedules are empty in ARCHICAD 18

{i} Note: Fixed in ARCHICAD 18 Update Build 8004.

Affected versions: 18 | Severity: workaround applicable

The interactive schedules are displayed as if they were empty when opened in ARCHICAD 18 under OS X 10.11 El Capitan schedule resize Workaround: Resize the schedule window. Reopening the schedule window is not sufficient, the content will possibly still be invisible, it has to be resized!

{i} Note: We plan to fix this issue in a future Update of ARCHICAD 18.

ARCHICAD becomes unresponsive, because second level dialog box jumps behind the first if you close a third level dialog box

{i} Note: Fixed in ARCHICAD 18 Update Build 8004 and ARCHICAD 19 Update Build 5005. 

Affected versions: 18 and 19 | Severity: workaround applicable

If you open 3 dialog boxes (each one from the previous dialog box), and close the 3rd one, you might notices that the 2nd dialog box disappears, and you can only see the first one, but it’s unresponsive. This is because the second dialog box jumped behind the first one, and that’s the one that’s actually active. Let’s see an easy example to help better understand the problem: 1. Open a Default settings dialog (1st dialog) 2. Choose the “Favorites…” button from the top left (2nd dialog) 3. Choose “Save Current Settings as Favorite” (3rd dialog) 4. Cancel the upcoming dialog 5. The 2nd panel should be behind the first one now Workaround: You can either drag the first dialog out of the way to reveal the active dialog box, or just press CMD+TAB twice.

ARCHICAD 18 and Start Edition 2015 can’t save texts on PDF, when using the Save As… option

{i} Note: Fixed in ARCHICAD 18 Update Build 7007. This issue is also fixed in the Temporary Compatibility Update.

Affected versions: 18 and SE2015 | Severity: workaround applicable

If you try to use the Save As… option to save a PDF in ARCHICAD 18 and SE2015, texts (Text, Dimension Text, Label Text, etc.) won’t be saved on the layouts. Workaround: In ARCHICAD 18, the publisher saves PDFs correctly. In SE2015, you can use the Operating System’s own PDF saver tool from the print dialogue.

Migrate Teamwork Project Dialog closes when “Open another project is selected”

Affected versions: 19 or older | Severity: workaround applicable

If you try to migrate multiple Teamwork projects to a newer version BIM Server, using the “Prepare for Migration…” option, and at the end of the preparation phase choose “Open another project”, the dialog closes. You can still migrate the project that you prepared. Workaround: Migrate your projects one-by-one.

{i} Note: We are planning to fix this issue in the next ARCHICAD 18 update.


ARCHICAD 19 becomes unresponsive with the latest Public Beta Update (Version 2-4, Solved in Version 5)

{i} Note: The issue is fixed with Public Beta Update Version 5.

Affected versions: 19 or older | Severity: solved

ARCHICAD becomes unresponsive after a few seconds of use. The application window can still be moved around, but no other interaction is possible (You need to Force Quit the application). Please do not update, if you haven’t done it yet.

App Nap

Affected versions: 19 and older | Severity: workaround applicable

App nap is a great  feature to help to save battery life. When this feature gets enabled, applications that run in the background will be slowed down. There are situations when ARCHICAD works in the background (e.g. drawing update) and you would like to run it on full speed. Workaround: To keep ARCHICAD alive in the background; disable App nap for the ARCHICAD.app. This is highly recommended for all Teamwork (BIMcloud, BIM Server) users.

  • search for the ARCHICAD applications in Finder: \Applications\GRAPHISOFT\ARCHICAD <version>\ARCHICAD.app
  • select the app an pull up the context menu, by right click or ctrl click
  • select Get Info
  • check Prevent App Nap checkbox

If App Nap is on, and you are working in Teamwork, App Nap might terminate the connection with the server, and you might even need to restart ARCHICAD in order to get it online again. App nap should be turned off for BIM Server Manager and BIM Server Control Center (applications in the BIM Server folder) because App nap might prevent the server to run smoothly. v18+ BIM Server and BIMcloud is not affected.

Info Tag can’t be displayed in ARCHICAD 18

{i} Note: Fixed in ARCHICAD 18 Update Build 8004.

Affected versions: 18 | Severity: there is no workaround

In ARCHICAD 18, the Info tag won’t be displayed, when you hover over an item with the Arrow tool. You need to select the item, and see it’s settings in the selection settings window. The issue only affects ARCHICAD 18.

Hotlinks are indicated as missing

{i} Note: the special ArchiCAD 17 hotfix 9 Build 8004 is dedicated to fix this issue.

Affected versions: 19 and older| Severity: workaround applicable

If hotlinks are linked from a network share that gets unmounted in the background, ARCHICAD is not mount the share back. Workaround: Re-mount the share in Finder and re-start ARCHICAD.

Mounted drives disappear in the ARCHICAD file dialog

{i} Note: We are planning to fix this issue in the next ARCHICAD 18 update.

Affected versions: 19 and older| Severity: workaround applicable

Mounted volumes can disappear from the left panel of the ARCHICAD file dialog (e.g. open file dialog, add library dialog, hotlink dialog). The problem crops up when the file dialog is brought up again after browsing into a folder of the mounted drive. The roots of this issue lie within the changes Apple made in the mounted volume handling for OS X Yosemite and it is not specific to ARCHICAD.

mounted volume disappear in file dialog

The mounted drive is still accessible via the Devices section. (Devices section can be turned on in Finder Preferences by ticking the checkbox next to the local drive.)

Publishing or Saving PDF in AC 17 from 10.10 or 10.11 client to SMB mounted 10.10 or 10.11 server results in 0 KB PDF file

{i} Note: the special ArchiCAD 17 hotfix 9 Build 8004 is dedicated to fix this issue.

Affected versions: 17 | Severity: not our bug, workaround applicable

This issue is related to changes to the SMB protocol in OSX10.10. In ARCHICAD 18, with the new PDF engine included, the problem does not occur. Workaround: Instead of SMB, try mounting with CIFS or AFP protocol

Hotlinks turn missing and can not be relinked in Teamwork

{i} Note: the special ArchiCAD 17 hotfix 9 Build 8004 is dedicated to fix this issue.

Affected versions: 17 | Severity: workaround applicable

Links get lost/damaged when the hotlinks are on a mounted drive. This issue is related to the alias algorythm behaving differently in OS X 10.10 compared to previous OS versions. Workaround: Use “one dummy user login” to access the file server. The SMB/AFP/CIFS connection to the mounted server should be established with ONE and ONLY ONE login info. (In teamwork all users can use their own account this is only important for mounting the server!) The hotlinks have to be relinked once the users are all using the “dummy user login” but then on the links will stay stable.

The installer hangs showing a spinning wheel

Affected versions: 17 | Severity: workaround applicable ARCHICAD 17 can only be installed using Java 7 on Yosemite.

If there is no Java 7 installed on your computer, Java 8 has to be downgraded to Java 7. More info about ARCHICAD and Java. In certain cases the installer may stop at the very beginning of the installation process and show a spinning wheel. A possible solution is to open System PreferencesLanguage and Region and change the Time format to 24-Hour Time. The same needs to be set if uninstalling the software is not possible. 12hour Based on the latest tests this only affects Regions, where the default is the 24-Hour format, but the settings is later changed to 12-Hour format. Reverting the original setting helps to resolve the problem.

Palettes disappear / turn transparent after using the “Application Windows”

Affected versions: 17 and older | Severity: workaround applicable

When using Apple’s Application Windows or Mission Control (formerly called Exposé) to switch between ARCHICAD windows, all palettes can disappear or turn transparent after returning from the overview. This phenomenon occurs when the cursor was left on an element before entering to the Application Windows. This issue has surfaced because of the changes Apple made in the Mission Control for OS X 10.10. GRAPHISOFT reported this problem towards Apple. Workaround: This glitch can be circumvented in ARCHICAD by turning off the Info Tag in Work Environment: info tag work environment

Installer is damaged and can’t be opened

Affected versions: 17 and older | Severity: workaround applicable

In certain cases OS X will give the following error when you try to mount an ARCHICAD 17 or older GRAPHISOFT provided dmg downloaded from the Internet: <Installer name>.app is damaged and can’t be opened. You should eject the disk image. Workaround: This problem can be easily circumvented by setting the Gatekeeper setting to Anywhere. After that the dmg should mount fine. The installers on the installation DVD are not affected, this issue seems to be related only to downloaded packages.

BIM Server (17 and older) doesn’t start after migrating to El Capitan

For detailed description on how to fix your Bim Server see this article.


Updating the operating system under BIMcloud and BIM Server

General recommendation

It is wise to hold off upgrading the OS of a BIMcloud, BIM Server computer unless there is a specific reason or need to do so. Do not upgrade the operating system of the BIMcloud or BIM Server until you have time to properly backup all projects, users roles and libraries. Be prepared for unexpected situations, to avoid any potential downtime that affects all Teamwork users.

Version 19 and 18 BIMcloud and BIM Server

The new versions were designed to be compatible with the built in version migration of OS X, though make sure you have a full backup before the migration.

Version 17 and older BIM Server versions

Based on our tests these versions survive the migration without any major problems, though from previous years’ experience sometimes repairing the BIM Server is required. If there are more modules installed (like 16, 17) or if you want to be on the safe side, the best is completely re-installing the BIM Server.

  • backup all of your BIM Server data (projects, libraries, users, roles)
  • uninstall all BIM Server modules
  • upgrade the OS to El Capitan
  • install the BIM Server, only install the modules that you are actively using – this might be the prefect time to archive old projects or migrate them to recent versions
  • import back all data

Transferring data between computers with Apple’s Migration Assistant

/!\ Warning: Transferring user data to another computer via Apple’s Migration Assistant to another computer with a newer OS X version (i.e. Computer A running OSX Mountain Lion 10.8 to Computer B running OS X Mavericks 10.9) is not advised and may result in corruption of ARCHICAD and BIM Server software. The recommendation is that you first back-up your project files and Teamwork data, then uninstall any GRAPHISOFT software from the original computer, perform the Operating System migration, then re-install GRAPHISOFT software on the new computer. Failing to do so may result in you having to fully re-install your operating system on the new computer and install all programs from scratch along with user data.


Apple hardware

BIMx Desktop Viewer

$
0
0

You have reached the help page of BIMx Desktop Viewer.

How to write a new article

$
0
0

Customize your Work Environment

Before starting to write articles in WordPress, it’s worth to setup a custom work environment. When you click on the Screen Options tab at the top right corner, the resulting screen shows the various Dashboard modules with a check-box next to each module. Check the box for each module you want displayed, or uncheck the box to not display that module. In a basic editing mode, the recommended modules are (that should be checked):

Create a new Page

In WordPress, you can write either Posts or Pages. On Help Center we are using the Page format, so be careful to select this content type.
From the top menu select the + New » Page option or go to Administration » Pages » Add New to begin writing a new Page.

A template is created for making your work more efficient. Open the link and copy the content of it into a new page! Click here

Required Fields

HC_required fields

HC_required fileds_2

Checklist

  Why is it important? / Comments
Title Page titles are weighted the most in our search results, so it is important to add simple, clear titles, that contain the keywords you would use in search
Affected versions Set the relevant product in the content field!
Severity Use: ‘workaround applicable’ or ‘ there is no workaround’ in the content field!
TT number It is easier to track the Troubleshooting guides if you enter the TT number in the content field.
Categories Select the relevant product and OS. If the article is not ArchiCAD or operating system specific, choose the “All supported ArchiCAD versions” and “Mac & Windows” categories from the list.
Synonyms Synonyms are useful to make the search more powerful. Use synonyms that are relevant by the article and users might use as a search term. Add the TT number as synonym too!
Tags Tags are useful in the search, you can enter the same keywords used for the synonyms.
Versions Select the relevant product and OS. If the article is not ArchiCAD or operating system specific, choose the “All supported ArchiCAD versions” and “Mac & Windows” categories from the list.
Excerpt Write a short summary! This excerpt is displayed on the tile.
Connected Pages To create connections between the current and other articles, you should set up a list of related pages. In the “Connected Pages (from)” box click on the “+ Create Connections” link and enter a relevant search string into the field. It will list all existing articles that includes the searched word. Push the + button on the left to create connection between the articles. The selected pages will be displayed in the list of “Related articles”. Always use Shortlinks!
Featured Image This image is displayed on the tile.
Authors Add yourself as an Author if you update the article!
Date If you update an article the date won’t be changed automatically, you should do it.
Visibility Before publishing the post, please make sure you have set the correct visibility. By default, all pages are visible for the public. Public posts viewable by everyone are assigned the published status, while drafts are assigned the draft status. Selecting the future status the article can be scheduled to be published in a future date. You can set the article on a per page basis for public (visible for every Help Center visitor), private (for internal people only, hides the content from the public), or password protected.
Arrange in the hierarchy Guides, videos, technotes and troubleshooting articles are arranged in hierarchies. Find and set the relevant parent page to your article. The page url will show the hierarchy as it is published.
Add the Shortlink to the DEV TT/Custom Fileds/Tech. Support Comment If a bug is corrected a note about it (fixed in ARCHICAD xx Update Build xxxx) should be added to the article. In the TT a filter is set for finding the corrected articles easily. But it works only if the shortlink is added.

Useful Tips

What is a shortlink? How to get a shortlink?

Shortlink is a tiny URL (URL shorteners). It contains an ID of the page. This link is permanent, even if you move the article this URL remains the same. If you want to link an article, you should always use the Shortlink.

What is a permalink?

Permalink is the link what you can see in the address bar of your browser. A Permalink is automatically created from the page title. It shows the URL that will be used for the page. Basically it’s not necessary to modify it, but by clicking the Edit button you can add another URL. This is not a permanent link.

How to insert an image?

  1. Place your cursor where you want to have the image appear
  2. Click the Add Media button
  3. Add a new image or select one from the Media Gallery
  4. Edit the Attachment Details on the right side of the panel. The following options can be set
    • Title: this is visible if you hover your cursor
    • Caption: not needed
    • Alternative Text: not needed
    • Description: not needed
    • Alignment: set Center or None
    • Link to: Set Media File
    • Size: your choice
  5. Select Insert In to the Page
  6. Click on the image and open its settings by clicking on the pen icon
  7. Delete the text next to the Image CSS Class

Need more help? Click here

How to insert a hyperlink?

  1. Select the text that you want be hyperlinked
  2. click the hyperlink button in the toolbar  Add_link
  3. Enter the URL of your hyperlink and click this checkbox to open the link in a new tab.

Edit content

In WordPress there are 2 editing modes available (use the tabs directly above the right side of the editing area to switch between these options):

  • Visual Editor: For basic text editing it’s worth to use the visual editor, as it is much simpler and easy to learn. The page can be styled using the various menu bar buttons.

More about the visual editing options: http://en.support.wordpress.com/visual-editor/

  • Text Editor: This editing mode is aimed at users who are comfortable working with HTML as it allows you to write your page in HTML format.

More about the template shortcodes: http://liquidfolio.queldorei.com/features/shortcodes/


BIMx In-App purchase: Sharing a Hyper-model (iOS & Android)

$
0
0

Share your BIMx Hyper-model (containing the 2D plans) with your clients with a single purchase. The In-App purchase option ‘Sharing a Hyper-model’ lets you buy and share your model with all of its 2D content to make it free for your clients and peers.

You can buy this option both in the free BIMx App for iOS/Android and in the paid BIMx PRO App for iOS.

Follow these steps to share the license with your Clients:

Tap on settings menu when the model is opened

Open the desired model in BIMx or BIMx PRO, and choose ‘Share this project’ (in BIMx PRO) or ‘BIMx Store’ (in BIMx).

01 BIMx Docs - sharing for current project

Sharing for current Project

Click on the link to purchase the activation code in the ‘Sharing a Hyper-model’ section.

Picture1

Sign in to iTunes App Store

Sign in with your Apple ID.

03 BIMx Docs - sharing for current project

Confirm your purchase

Click on Buy link to confirm the purchase.

04 BIMx Docs - sharing for current project

Model Successfully Shared

You will receive the confirmation that the Hyper-model was “Successfully Shared”

Successfully shared (URL)

You can now see your model as shared within the BIMx Transfer site.

BIMx Transfer Site

Send the download link in email

Use the “Send link” option to share the Model link with clients, colleagues, …

Send link page

Pressing “Send link” will automatically open-up an email template, it will provide the recipient with the location where the model can be downloaded from, but also the download links for the BIMx application (iOS and Android).

The message body contains a special link with bimxshare:// prefix. Should your clients have the latest version of BIMx for iOS or Android installed, by tapping on this link in the Mail application, the system will automatically recognise the prefix and launch BIMx app.

Email template

Notes:

  • Once the Hyper-model has been downloaded on a certain device, it can be updated for free — as many times as needed, also without any time constraints.

Downloading BIMx model with full PRO functionalities

BIMx starts downloading the model and then displays the ‘Access granted’ message. After the download is finished, the client will be able to access all the BIMx PRO functionalities on that specific Hyper-model.

07 BIMx Docs - sharing for current project

Access model elements in BIMx via hyperlinks

$
0
0

Easy data access is essential on construction sites and with facility management. BIMx offers a feature for locating 3D elements in the Virtual Building easily which greatly helps with checking and marking up these elements on site. To be able to access BIM elements in the 3D model quickly, insert these hyperlinks into any website, an FM database or into a Product catalog application.

Note: This feature requires BIMx PRO functionality, that can be obtained either by:

  • purchasing BIMx PRO in the App Store (iOS)
  • purchasing the BIMx PRO license for the free BIMx app (AndroidiOS)
  • accessing a shared BIMx model (Android, iOS)
  • joining into a BIMcloud project (Android & iOS)

How to build up a hyperlink

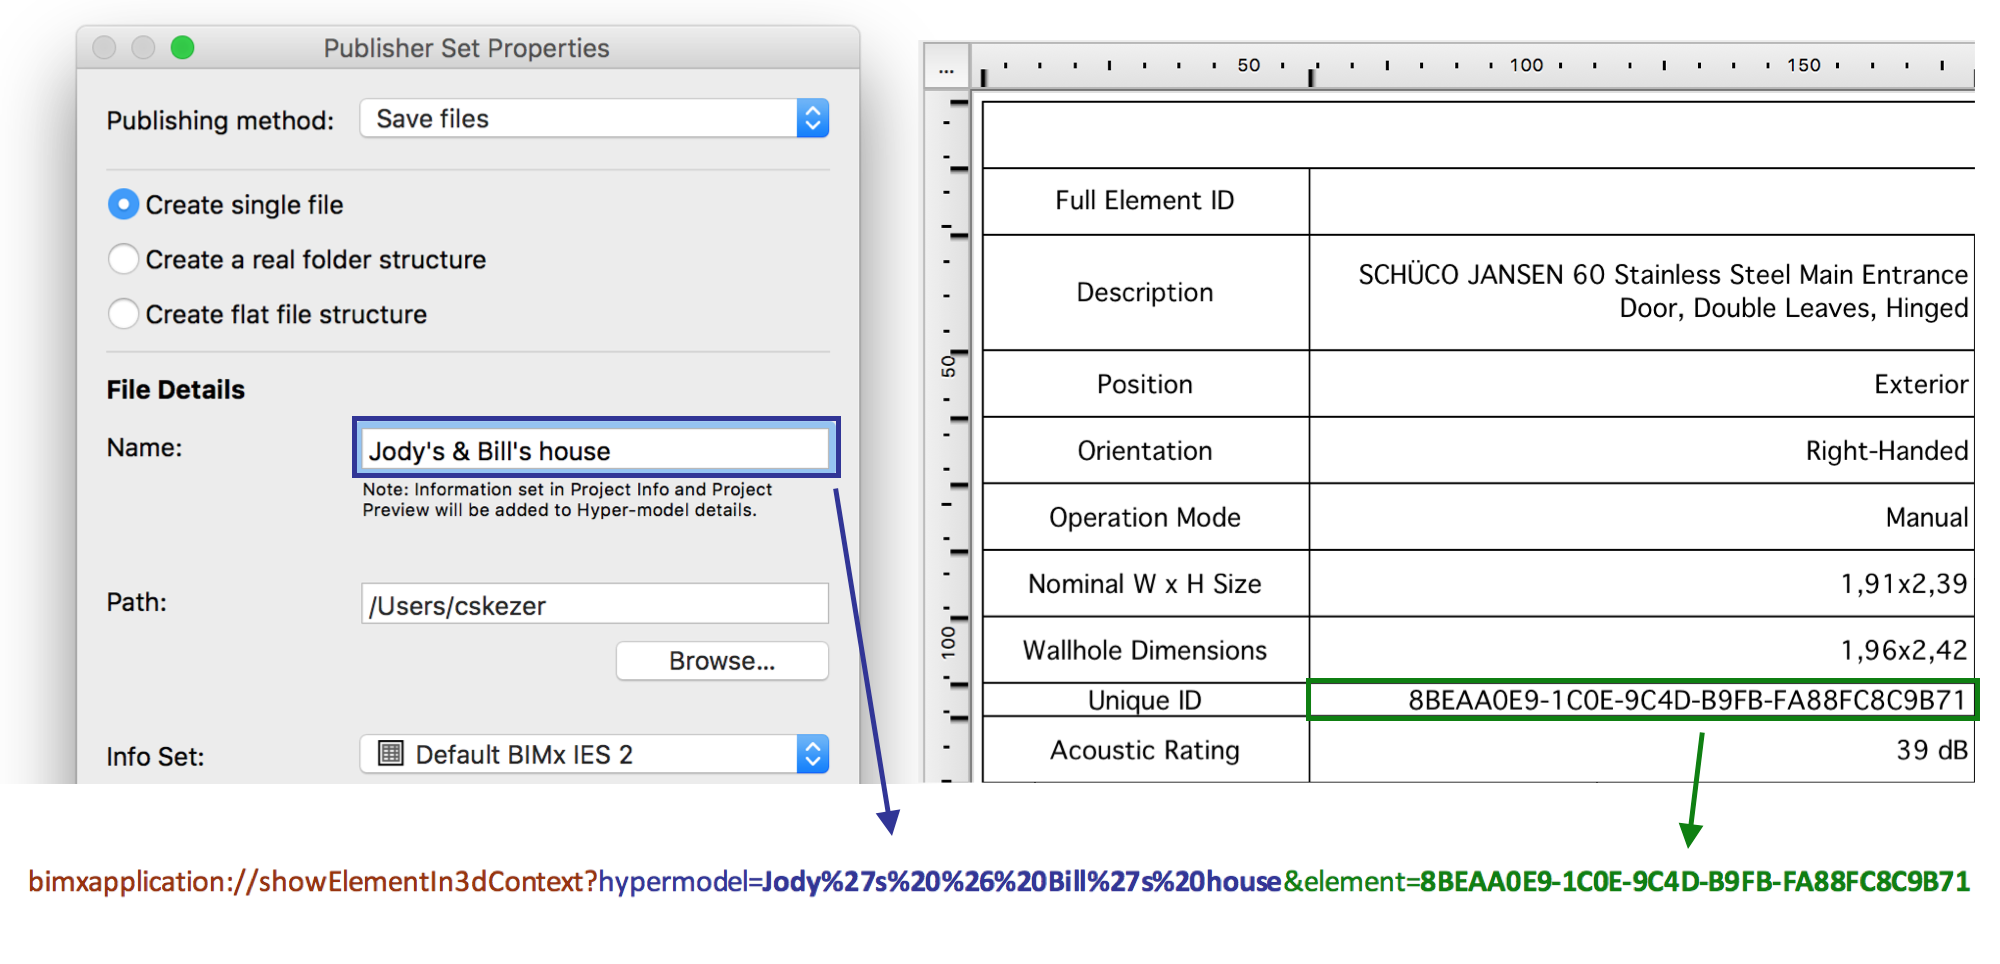
An element access hyperlink consists of three individual parts. The template for hyperlinks looks like this:

bimxapplication://showElementIn3dContext?hypermodel=hypermodel_name&element=Unique_ID

Build up the hyperlink manually

  1. The first part contains GRAPHISOFT’s multi-platform ‘custom url scheme’ technique. This scheme is registered by the OS when you install the BIMx app on your mobile device. From that point on the OS will recognise that this URL is associated with BIMx, therefore it will Open the BIMx app when the link is tapped.
  2. The second part defines which BIMx Hyper-model to open from your available Models. The hypermodel_name part needs to be replaced with the name you defined for the BIMx Publisher Set. If the Publisher Set name contains any special characters it needs to be converted with the default URL encoding (https://en.wikipedia.org/wiki/Percent-encoding)
  3. The third part contains the Unique_ID of the element that you want to access with the hyperlink. This ID can be obtained in ARCHICAD, by listing the Unique ID field in the Interactive Schedule.

Example:

BIMx custom hyperlink to 3D element

Get the complete link from BIMx

When a model is published to BIMx, the above link is automatically generated for each 3D element in the project. This link can be obtained by navigating to the element in the 3D view of the BIMx project and choosing the Copy Hyperlink command:

BIMx Copy Hyperlink

How to use the hyperlink

Open BIMx from external applications

If you launch this link from any application on your mobile device (Mail, browser, etc.) then it will bring up the BIMx app on your mobile device, open the requested hyper-model, select the linked model element and zoom to it in 3D. This way you can access any 3D model element easily without navigating manually in the model.

BIMx access hyperlink selection

Navigate to a 3D element from a BIMx schedule sheet:

BIMx recognises email addresses and website links in schedule sheets. It is also possible to add these custom access hyperlinks to any custom field of a schedule. This way elements can be browsed from a list and when tapping its link it will automatically appear selected in the 3D view of the model:

open 3D from schedule


CodeMeter protection known issues

$
0
0

ARCHICAD 19 (3003, 4011) installation process can delete /usr/local folder on Mac if CodeMeter driver was present previously

Because of a previous CodeMeter uninstallation process the /usr/local folder might be deleted during a new installation of ARCHICAD 19.

With the 4013 update this issue has been fixed, so if the CodeMeter driver is removed by an ARCHICAD 19 4013 or above the /usr/local folder will not be deleted.

ARCHICAD 19 (4011) and 18 (7007) cannot find licenses from Network License Key

ARCHICAD can run only in demo mode if the CodeMeter driver’s version is older than 5.00 on the License Server computer.

Solution is to update the CodeMeter driver on the license server to the 5.22a CodeMeter Driver found here.

A free license is needed for the borrow operation

UPDATE: In ArchiCAD 15 this has been fixed. (Make sure you have only one ArchiCAD session running on the computer where you would like to borrow a license.)

For the borrow operation one free license is needed. If you haven’t got a free license close your ArchiCAD on the computer where you would like to borrow a license (then this license will be free) and borrow from the CodeMeter Control Center.

  • run CodeMeter Control Center from Applications/using the Start menu
  • choose the Borrow tab
  • select the license and borrow
  • the return can be done from here as well

codemeter-knownissues--borrow

/!\ To make it possible to borrow a license using CodeMeter Control Center an inactive license file is required, which is registered by ArchiCAD. To create that first try to borrow using ArchiCAD (Help/License Information) – generate the license file by following the instruction, close ArchiCAD and borrow using CodeMeter Control Center.

Protection key is not responding

In most of the cases this error comes when ArchiCAD runs in the background. Possibly there is no problem with the protection key itself, by selecting ArchiCAD the message should disappear. Of course when loosing connection to the CodeMeter server this also appears, in that case verify the server and the network connection.

There is a know issue with the driver v4.30a: on Mac ArchiCAD cannot return from this state. With driver version 4.20d (shipped with ArchiCAD 15) this can be avoided. (the latest 4.30b driver also works fine, but note that it hasn’t been tested yet by GS)

License will be broken if not uploaded back to pool before saving with Time Machine

All the borrowed licenses should be uploaded back to the pool, before saving point with Time machine, otherwise they will get corrupted. It works like that to prevent duplication of Licenses.

ArchiCAD drops borrowed license

Issue: After borrowing ArchiCAD and MEP or EcoDesigner licenses, quitting and restarting ArchiCAD will not find the borrowed license. Either of the following will happen: In case you are offline, “protection key not found” error pops up when launching ArchiCAD. If you are online, ArchiCAD will use a network license. It’s even possible to borrow licenses again (and in this case the key server will show 2 licenses borrowed to the same machine).

Cause: If you are using CM driver version 4.20b, ArchiCAD “drops” the borrowed ArchiCAD license if you borrow an MEP or EcoDesigner license as well.

Solution: Use driver 4.20d (or later) on all related computer (server client) available from here

OSX Lion users should upgrade to driver v4.30c

On OSX Lion keyplugs may not be recognized by CodeMeter Control Center. Wibu System has fixed Lion specific issues in driver version 4.30c, so it is strongly recommended to install that on all Lion based computers. The latest driver can be downloaded from here.

Borrowing stops to work or the license cannot be returned

You can find the description of this issue here.

The computer does not start when a CodeMeter key is plugged in

This problem only occurs occasionally on Windows operating systems. The computer recognizes the CodeMeter key as an USB storage drive and tries to boot from that. Here is how you fix it:

For CodeMeter Driver version 4.30 and above

  • Search for CodeMeter Command Prompt and double-click to run it.
  • A command window will appear.
  • Type the following & press Enter or Return:   cmu32/sx-xxxxxxx –set-config-disk RemovableDisk

Where x-xxxxxxx is the serial number printed on the USB key starting with the first number digit after “SN:”
Make sure you include a space after x-xxxxxxx and disk

Example:

  • Command Prompt 002
  • As it prompts in the command window, unplug and re-plug the CodeMeter key back in.
  • Finish.

To Reset to Default:
Repeat the above using the command below instead:
cmu32/s0-0000000 –set-config-disk LocalDisk


For earlier versions of CodeMeter Driver:

  • Start All Programs/CodeMeter/Tools/CodeMeter Disk Configuration The tool should automatically find the key and list it in the left column of the window
  • Make sure that the key is selected and also make sure that under info it says version 1.16
  • Click the Options tab
  • Change Disk type to “Removable Disk”
  • Hit Apply changes
  • Eject and remove the key
  • Re-plug the key

CodeMeterFirmwareVersion.png CodeMeterDiskSetup.png

If your key’s Firmware version is lower than 1.16, then:

  • Open CodeMeter Control Center from All Programs/CodeMeter/CodeMerter Control Center
  • Click on your key
  • Check the version, and if it is lower than 1.16 then click the icon near that to update the firmware

UpdateFirmware.png

CodeMeter server does not work on Mac after 10.6.3 OSX update

In some cases the clients can not recognize the CodeMeter server running on Snow Leopard 10.6.3. In that case please uninstall the CodeMeter driver 4.10a – which comes with ArchiCAD 13 – using the install DVD of ArchiCAD

  • insert the disk/mount the image
  • browse the DVD in finder
  • run CmUninstall.app from the CodeMeter folder
  • reboot your computer
  • download the latest CodeMeter driver (4.10c) from here: Wibu download page
  • install the driver
  • set up the server again

Nothing happens when clicking on connect – first time borrowing

In case you are about to borrow the first license, ArchiCAD tries to connect to the GS server. (CodeMeter/LicenseBorrowing#InactiveLicense) There are cases where it fails – get you simply back to the previous dialog. In that case:

  • try to borrow again and use the offline way – generate request (as described here.)
  • try to import back the result file
  • if it also fails open CodeMeter Control Center
  • select the license visible there on the list (not starting with 2 or 128)
  • click on license update and use the file you downloaded from the Graphisoft site

Recycle Bin does not work while the license key is plugged in

Change the Drive letter of the key. To do that plug the key then open the Disk Manager. You can open the Disk Manager by right click on My Computer/Manage, or by Start/Run – diskmgmt.msc. Right click on ‘CODEMETER’
then select ‘Change drive Letter and Paths’. Select the drive letter and Remove it.

Cannot Return License

In case the license cannot be returned it worth it to check where the CodeMeter driver wants to return the license

  • open a CodeMeter WebAdmin
  • Content/Licenses/ click on the Product Code (61) near the Graphisoft Borrowing License
  • the Borrow Server field show the server’s name or IP

name.png
The system administrator might help how to make possible to reach the server using that name.

In many cases it is worth it to change how the server is identified by the clients. By default this is based on the server’s hostname, but in many cases the clients cannot reach the server on the name as it nows about itself. (Networks without a DNS server, mixed environment – Macs+PCs). Here you can find how to change this on the server side: CodeMeter/LicenseBorrowing#How_to_set_up_a_CodeMeter_license_server

Only the computer name identifies the server

Sometimes the value contains only the computer’s name (computer) and not the full domain name. (computer.domain.com) In the network settings it can be made possible to reach the server.

  • on Mac: Open System Preferences, Network, select the used connection type, enter the domain in the Search Domains field (domain.com)
  • on Windows: Control Panel, Network and Internet, Network Connection, select the used connection type, right click, properties, select the used protocol, properties, advanced, dns tab, enter the domain in the Append these DNS suffixes field (domain.com)

networksetting.png

Borrowing doesn’t work on Virtual Computers

License Borrowing – Act (Soft) is not supported on clients, which are virtual machines. The following error messages indicate that, during the License Update process.

Using Connect option:

connect.png

At Request file creation:

request.png

Borrowing licenses is not allowed to Virtual Machines.

Cannot repair CodeMeter driver

On some Windows computers when running the installer of the CodeMeter driver – in repair mode – it gives Internal Error 2324.2 C:\Windows\system32\ WibuCmWeb64 .dll error message.

The workaround is to uninstall the driver and install it again.

/!\ Before doing that make sure there aren’t any licenses in borrowed state.

CodeMeter WebAdmin doesn’t open on Internet Explorer 9

Wibu has released a new driver (4.30a) where they fixed this problem, install this new driver on all related computers or use an other browser e.g. Google Chrome.

A single key cannot be used as a server key

With Wibu keys it was possible to use a key that has a single license as a server key. With CodeMeter protection you need a NET key for that.

ArchiCAD 12 cannot be started if newer versions are currently being used

Issue:

ArchiCAD 12 gives All available licenses are being used error message even there are available licenses on the license key. This only happens if newer ArchiCAD versions (13, 14, 15, 16) are running when you try to start ArchiCAD 12. Also if you have v12 running you cannot run newer versions.

Cause:

The problem is caused by a compatibility issue between the CodeMeter enabler technology and the CodeMeter driver version 4.40 (which is a default part of the ArchiCAD 16 package)

Solution:

Close all other ArchiCAD versions when running ArchiCAD 12 or close ArchiCAD 12 if you would like to run ArchiCAD 13+. In case you have a network license on your key – make sure that the license server is not running on the same computer where you use ArchiCAD 12.

IFC based data exchange – Troubleshooting guide

$
0
0

General recommendations for IFC based data exchange between ArchiCAD and Revit products

Always use the up-to-date version of ArchiCAD and the Revit Add-Ins as GRAPHISOFT constantly improves the data exchange between the two applications through the combination of these.

Known issues

Show visible function is not updated by Viewsets

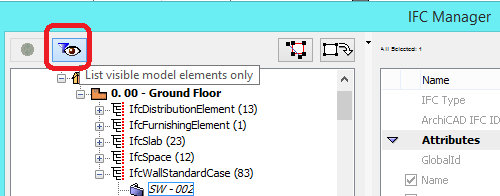
Issue

The content of the IFC Manager tree doesn’t refresh when changing Viewsets, even if the “List visible model elements only” option is turned on in the IFC Manager dialog.

Cause

The “Show model selection in list” function doesn’t work on elements which can be seen in the model, but cannot be seen in the IFC Manager because of the missing refresh function. It doesn’t refresh after closing and reopening the IFC manager either.

Workaround

These elements will appear in the tree only if turning off and on again the “‘List visible model elements only” button. But this could take time, depending on the size of the model.

IFCListVisible

IFC SCheme Setup

Issue

The two default IFC schemes: Concept Design BIM 2010.xml and COBie.xml are troublesome to find when using the Merge command in IFC Scheme Setup.

ifc.png

Cause

The Merge command of the IFC Scheme Setup Window (File > File Special > IFC 2×3) opens the last selected folder instead of the IFC Scheme folder located here: Applications/GRAPHISOFT/ArchiCAD XX/Defaults/IFC Schemes.

Solution

Please navigate to Applications/GRAPHISOFT/ArchiCAD XX/Defaults/IFC Schemes to locate the default XMLs.
XX is the version of your ArchiCAD.

IFC Import Populates Embedded Library

Issue

IFC import can populate the embedded library. This behavior can lead to very large embedded libraries and possible performance problems.

IFCembeddedLibrary_80.png

Solution

ArchiCAD 18

When you import an IFC file ArchiCAD 18 will ask where you would like to place the objects to be created. Select Linked Library and define a path. It is suggested to compress the library into a Library Container File (.lcf).

If you have selected not to show this dialog again, you can change these IFC library settings in IFC Options (File menu/File Special/IFC 2×3/)

ArchiCAD 17

You can change the location of the imported objects in IFC Options (File menu/File Special/IFC 2×3/). Select Linked Library and define a path.It is suggested to compress the library into a Library Container File (.lcf).

ArchiCAD 16

This new behavior was introduced with ArchiCAD 16 Hotfix 3 build 3480. To activate it the EnableLinkedLibrary key needs to be added to the Registry under the IFC registry folder. On a Mac a new key with a Boolean type needs to be added with its value set to “True.” The below example shows this key on Windows. (with an Australian ArchiCAD version).

{i} If the IFC folder is not present this generally means you haven’t yet run an IFC import on your computer. Navigate in an open instance of ArchiCAD 16 to File / File Special / IFC 2×3 / IFC Translation Setup and press save [Save Settings & Close] button.

Note for Teamwork Users

In a teamwork environment linked libraries cannot be used. It is prudent to import an IFC file outside of a teamwork environment, and then hotlink it into the teamwork project as a mod file that you created as part of the IFC import. The linked library that was created can be used to update or create a Bim Server library that is associated with the teamwork project.

Workflow suggestions

After activating this behavior your IFC imports will not populate the embedded library with objects. Instead a folder named after the IFC file and located on the given path (17 and 18) or in the same directory as the source IFC file (16) will be created, unless this folder already exists. Within this folder a folder will be created based on the date and time in seconds that the import took place. This folder will be automatically linked to the imported project.

In the below example a file called “2020Sherman_WestWing.ifc” was imported. Since this was the first time a project of that name was imported a new folder “2020Sherman_WestWing” was created. Under the “2020Sherman_WestWing” folder another folder was created. It was named 20130103_154222_000 and linked to the imported file. The 20130103_154222_000 folder contains all of the library objects generated in this import.

IFCfirstImport_80.png

The second time an IFC file is imported with the same name only the sub-folder 20130103_160343_000 is created to store the new objects. This is a nice way of keeping your imports sorted.

IFCSecondImportLibrary_80.png

A new IFC file name will create a new folder and link. Thus your IFC libraries can be clearly organized using the name of the IFC file that created them and then further organized by the time the IFC file was imported.

IFCEastWingImport_80.png

 Text Size do not Appear Correctly in Revit after Export

Issue

If you use DWG files to exchange information between ArchiCAD and Revit, the text size may be not correct, it will not react to scale changes.

Cause

Revit has two types of text: simple text and model text. If you import text from DWG, it automatically becomes simple text in Revit, that reacts dynamically to scale changes.
But after import, Revit handles the DWG file as one block, so it will be in the scale that it was imported from. After an explode command, the text will dynamically change, but you have to be aware that it will use the scale that has been set before the explode command.
Note, that if you link drawing or use Xref, exploding is not possible.

Solution

The are two possible workarounds to solve this situation:

1. Do not import the drawing using Link CAD but Import CAD, that creates a copy directly into drawing – this is the way to use explode. After the import you have to set the scale to the one used in the source drawing, then explode.

ImportCAD3.png

Disadvantages of this solution: the connection between the two drawings is lost, the file size will increase, the drawing will be more complicated.

2. Use ArchiCAD to connect the drawings – if you export the drawing as an Xref, the text elements will also change dynamically.

The IFC file has missing elements on Windows, while on Mac it is complete

The problem is caused by the length of the path to the file in question. The file/folder path can not be longer than 256 characters. Some elements will be imported as objects and for that the object file is created in the system. When the object file is created the name of the ifc file is used. Since the name of the file is too long, the path is too long and the import fails.

The workaround is to shorten the name of the file.

Windows and doors are placed outside of walls in Revit products

In some circumstances when Revit loads ArchiCAD saved IFCs, windows and doors are placed far from the wall where they belong to.

To fix the representation:

  • After the IFC is open in Revit, select the window or door
  • Click on Edit Type
  • Choose a different Family – there should be quite a few with similar look
  • Then the window should jump back to its place

In many cases door or window objects are not important for e.g. structural or MEP consultants. In such cases the best is not exporting the doors and windows, only their openings only.

A couple of ways how doors and windows can be filtered out:

  • Filter elements in 3D
    • Go to View menuElements in 3D ViewFilter Elements in 3D
    • Check out Doors and Windows
    • Save this as a new view and use the view when creating IFCs
  • Use Model View Options
    • Document menuSet Model ViewModel View Options
    • Create a new Model View Option or customize an existing one
    • Under Options for Construction Elements choose Show Opening Only for Doors and Windows
    • Save a new using this filter and use it when creating IFCs

Cannot use more language versions of Revit Add-Ins

Issue: After installing more than one language version of the interoperability Add-Ins, like the Improved ArchiCAD Connection Add-In for Revit Structure/MEP or the MEP Export to ArchiCAD Add-In for Revit MEP, the Revit application works incorrectly. Only one of the language versions appear of the Add-Ins.

Cause: More than one language version of these Add-Ins cannot run simultaneously with Revit.

Solution: Before installing another language version of the Improved ArchiCAD Connection Add-In for Revit Structure/MEP and/or the MEP Export to ArchiCAD Add-In for Revit MEP uninstall the previously installed Add-In.

Overlapping Zones create hole in Revit

Issue: When opening an IFC file in Revit, only one zone with a hole is visible instead of two zones .

001.jpg

Cause: Two zones were created in ArchiCAD on each other. Saving the file as IFC and opening it in Revit gives different result. Revit does not support overlapping zones.

02.jpg

Layer management problem for IFCs coming from Revit MEP Add-In

Issue: When opening/merging IFC files from Revit saved with the help of the Revit MEP Add-In: Even though the option ‘Imported layers with extension’ was used everything will be set to the IFCLayer.extension. layernam.png

Cause: The layer information is not considered in case the IFC file comes from Revit MEP.

Solution: This bug will be eliminated in the next Revit MEP Add-In.

/!\ Note that this affects only IFC files saved with Revit MEP Add-In.

Imported Structural Model is not displayed

Issue: How is it possible that I import a structural model, yet it is not displayed with the current Partial Structure Display setting?

Cause: This can happen if Partial Structure Display is set to “Core of Load-Bearing Elements Only.” Even though the structural engineer determines which elements are load-bearing, some structural applications nevertheless do not classify these elements as “Load-Bearing” when saving the model in IFC format.

As a result, if you Merge the model to ArchiCAD or use the Detect IFC Model Changes command, and if the ArchiCAD view is set to “Core of Load-Bearing Elements Only,” then the elements (or the changed elements) will not be displayed in that view – because only the elements defined as “Load-Bearing” are displayed.

Solution: The solution is easy: change the view to a different Partial Structure Display setting, such as “Entire Model.”

Can not merge IFC model into a TeamWork project

The program gives ‘You need the next access right(s) to IFC: Exlusive Access to Create or Modify Stories’ error message while merging the model even the current user has team leader role (with all rights).
IFCTW.PNG
By reserving the story settings the right(s) can be guaranteed.

Opening of the IFC file with Revit Add-ins is not possible in Revit Viewer 2013 or in Revit in Viewer mode

The opening process requires data saving, and it is not allowed in Viewer or in Viewer mode.

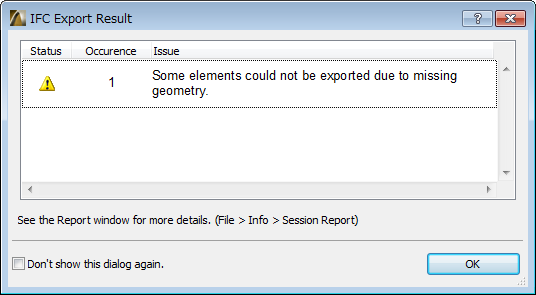
Some elements could not be exported due to missing geometry

missing geom


In ArchiCAD 17 when there is a problem during export, the interface informs users about the GUID of the problematic element. This method is at times too sensitive, it shows the warning in case of empty openings (Doors and Windows empty rams in a Curtain Wall) despite of the fact that the IFC file stays correct. The listed GUIDs could belong to Simple Door/Window Openings.

The resulting IFC file is correct. If one navigates to these empty doors in Solibri e.g.., the objects are exported/present in the file.

The reasons for the export ambiguity are the following:

– In ArchiCAD a door/window is one element, but in IFC they are two entities: the door structure (IfcDoor) and the opening (IfcOpening).

– In case of an empty opening in ArchiCAD only one entity will be exported, the IfcOpening, and AC misses the IfcDoor, that does not really exist.

These error messages are not saved into the IFC file.


QuickTime

$
0
0

alt textGRAPHISOFT used QuickTime, Apple’s multimedia environment in legacy ARCHICAD versions. See how different ARCHICAD versions used QuickTime’s technology’s in detail below:


ARCHICAD 18 and newer

ARCHICAD 18 & newer doesn’t install or use QuickTime.


ARCHICAD 15, 16, 17

In ARCHICAD 15, 16 and 17 QuickTime is used for:

  • processing QuickTime specific image files
  • creating Fly-Through and Sun Study movies

Without QuickTime being installed, only those image formats work with ARCHICAD that are supported by Windows and OS X (etc.: JPG, PNG, BMP, GIF, TIFF). In such a case ARCHICAD 15/16/17 cannot use QuickTime specific image formats and can’t create Fly through/Sun Study Movie files.


ARCHICAD 14 and older

In ARCHICAD 14 and older versions QuickTime is used for:

  • processing all image files
  • creating Fly-Through and Sun Study movies
  • creating Virtual Reality Scenes and Panoramic Views

Without QuickTime being installed on the computer ARCHICAD 14 and older versions can’t be used. Since QuickTime is the core component for all image handling processes in the software, ARCHICAD cannot start up without it.

High Resolution Display Compatibility

$
0
0

This article describes the Retina Display compatibility with GRAPHISOFT products.

ARCHICAD 19 and Macs with Retina Display

As technology goes ahead, high-resolution displays are becoming more and more popular. We, at GRAPHISOFT have recognized this tendency, and tailored our products to satisfy this need.

ARCHICAD 19 supports all Macs with Retina displays currently available (including the 5K iMac). We enhanced the speed of 2D and 3D navigation, and fixed some compatibility issues regarding retina displays. To experience the benefits of these improvements, make sure you have the 2D Drawing Hardware Acceleration set to Full:

  • Open ARCHICAD
  • Open Options/Work Environment/Advanced Redraw Options
  • Set 2D Drawing Hardware Acceleration to Full

ARCHICAD 18 (or earlier) and Macs with Retina Display

iMac with Retina 5K display, 4K displays connected to Macs

The new iMac with Retina 5K display features a screen that has resolution of 5120 by 2880 pixels. This is four times more pixels to calculate than with a regular 27″ iMac.

Based on GRAPHISOFT’s latest tests the performance of ARCHICAD can drop in some situations:

  • the visual feedback in 2D windows may have some delay
  • zooming in 2D windows my have lower FPS
  • turning trace and reference or the tracker on, slows down both of the two above and navigation (pan) may be slower as well

Turning ARCHICAD in low resolution mode results the same speed as with non Retina iMacs:low res

  • close ARCHICAD
  • locate ArchiCAD.app in Applications/GRAPHISOFT/ArchiCAD xx folder
  • select the application
  • from the context menu choose Get Info
  • check Open in Low Resolution

The performance on external 4K displays greatly depends on the type of Mac you use. Refer to Apple’s guide on 4K compatible Macs. For the best 3D speed make sure to choose a Mac with dedicated graphics.

GRAPHISOFT is actively researching the available technologies to improve the performance on such high-res displays.

MacBook Pro

ARCHICAD works smooth on retina MacBook Pros. For the best performance select models with dedicated video cards, like the top of the line 15″ model with NVIDIA GeForce GT 750M.


ARCHICAD and High Resolution Displays on Windows

ARCHICAD 18 and 19 supports High Resolution displays on Windows, but you may find icons and texts hard to see (depending on DPI). This issue is solved on an Operating System level.

Windows 7

In order to make Icons and Texts bigger, You need to enlarge them throughout the whole operating system. To do this, You’ll have to right-click on the desktop, and select ‘Screen Resolution’. In the upcoming window select the “Make text and other items larger or smaller” option, and choose the desired size (in percentage). The settings should take effect after logging out. Make sure that ARCHICAD is not running while you’re making these changes.

If after applying these settings you still find icons and texts too small, You’ll need to set the screen resolution lower.

Windows 8

In order to make Icons and Texts bigger, You need to enlarge them throughout the whole operating system. To do this, You’ll have to right-click on the desktop, and select ‘Screen Resolution’. In the upcoming window select the “Make text and other items larger or smaller” option, and choose the desired size using the slider. The settings should take effect after logging out. Make sure that ARCHICAD is not running while you’re making these changes.

If after applying these settings you still find icons and texts too small, You’ll need to set the screen resolution lower.

Windows 10

In order to make Icons and Texts bigger, You need to enlarge them throughout the whole operating system. To do this, You’ll have to right-click on the desktop, and select ‘Display settings’. In the upcoming window You can choose the desired size (in percentage) using the slider. The settings should take effect after logging out. Make sure that ARCHICAD is not running while you’re making these changes.

If after applying these settings you still find icons and texts too small, You’ll need to set the screen resolution lower.

{i} note: After applying these settings, Icons might seem a little edgy. That’s because ARCHICAD icons are raster images not vectorial.


Known issues

User interface appearance bugs

Issue:

Sometimes after upgrading to a High Resolution Display on Windows (such as 4K), some display bugs may appear in menus and dialogues.

Solution:
Usually this is because ARCHICAD was open while you were changing the size of the icons and texts. In order to fix it, you need to follow the steps below:

1. Close every running ARCHICAD session
2. Right-click on the desktop, and select ‘Screen Resolution’ from the context menu, and then choose the “Make text and other items larger or smaller” option
3. Set the zoom to a different percentage (e.g. 150%) and log off
4. Log in, and start ARCHICAD (the glitch shouldn’t be present this time)
5. Close ARCHICAD, and set the zoom back to the original value (e.g. 125%)
6. After logging off and in again, and then starting AC the graphical glitches should be gone


BIMx on mobile devices

The latest version of BIMx on iOS fully exploits the possibilities of the Retina Display. The application has already been updated to support the latest devices.

Find BIMx in the App Store

Here is a screenshot of BIMx running in HiDPI environment:


BIMx.jpg

Please note that the image is re-scaled. Click here to see the cropped image in original resolution.


ARCHICAD (17 or earlier), BIMx Desktop Viewer

High Resolution Display support in ARCHICAD 17

  • ARCHICAD 17 is fully functional on High Resolution displays both in 2D and 3D design environments

High Resolution Display support in ARCHICAD 16

  • ARCHICAD 16 is fully functional on High Resolution Displays. Benefits of using ArchiCAD in full Retina (HiDPI) mode include: remarkably sharp and smooth 2D element and text display.
  • ARCHICAD 16 Hotfix 2 (3270) contains some further improvements:
    • Extended support for trace reference
    • Retina (HiDPI) resolution support in 3D design environment (OpenGL, Internal Engine)
    • Minor fixes to icons

High Resolution Display support in ARCHICAD 15 and earlier

  • ARCHICAD 15 currently has usability issues when used in HiDPI mode: popup windows might appear outside of the visible screen. We recommend using ARCHICAD 15 and earlier versions in normal resolution (HiDPI mode turned off) on the new MacBookPro computers: open Applications and highlight ARCHICAD within the Graphisoft folder. Choose Get Info and check in the Open in Low Resolution mode. See the steps detailed: http://support.apple.com/kb/HT5266


Software Key FAQ

$
0
0

What is a Software Key?

Software-Based Protection Keys – or Software Keys for short – have the same functionality as Hardware-based Protection Keys, but instead of storing software licenses on an USB stick, the licenses are stored in a software container file on your computer.

Software keys use the same CodeMeter technology as the metal USB keys most ArchiCAD users currently have. This means that any ArchiCAD version that is natively compatible with the CodeMeter keys (ArchiCAD 13 or higher) will also be compatible with the Software Key.

What are the similarities and differences between Hardware and Software Keys?

Software Key is fully equivalent with the CodeMeter Hardware Key in terms of software protection functionalities, yet its delivery, deployment and management greatly differ from the hardware protection.

  • They both use the same CodeMeter technology
  • They both can contain single and network licenses
  • They both can contain ArchiCAD an add-on licenses and from ARCHICAD 19 on borrowing licenses as well
  • They both can be transferred from one computer to another

But:

  • With Software Keys there is no physical hardware to store the license. The licenses are stored in a ‘container file’ located on the user’s computer.
  • Software Keys can be assigned to individual users in the company. The ‘owner’ of the Software Key can upload, download and transfer the License Key between computers.
  • The owner and the location of a Software Key can be easily monitored in the ‘Company License Pool’ on the graphisoftid.graphisoft.com website

What are the benefits of the Software Key?

  • A software key is harder to lose, misplace or damage, since it resides on your computer. If your computer is lost or destroyed, a Software Key can be easily replaced.
  • A software key is delivered through the internet, so there are no shipping cost and shipping time
  • For companies with multiple protection keys, the management of the license inventory is simpler, since the inventory can be managed on a website – this is called the ‘Company License Pool’.

How is a software key delivered?

If you have ordered ArchiCAD with a Software Key, you need to do the following:

  • First, you need to create a GRAPHISOFT ID. If you have already have an ID for MyArchiCAD, BIMx or BIMcomponents, you can use your existing ID as well, provided it’s not a Facebook or Google-based ID.
    You can create a new GRAPHISOFT ID here.
  • You need to download and install the License Manager Tool (LMT).
  • Start LMT and sign in with your GRAPHISOFT ID
  • If you are doing this for the first time, the application will ask you for an authentication key. Your reseller supplies this authentication key to you.
  • After successful authentication, you will see the licenses that are available for you.
  • Select the key you want to download, and follow the instructions of the LMT application to finish the process

How can I transfer a software key from one computer to another?

The basic idea is that you can return a software key to your ‘Company License Pool’ and then download it again on a different computer. You can do this as many times you want. The steps are:

  • On the computer where your license is currently installed, start and sign in with your GRAPHISOFT ID to the License Manager Tool
  • Upload the software key to Company License Pool
  • On the computer where you want to download the license start the License Manager Tool, log in with your GRAPHISOFT ID and follow the instructions.

What happens if my computer breaks down and I lose the Software Key installed on it?

Get in touch with your reseller who will be able to help with your individual case. You will need to fill out a declaration form, and depending on the situation and your SSA status, you will either get a free replacement, or you may need to pay a replacement fee.

My company has multiple Protection Keys. How can I manage them if I switch to Software Keys?

Company Licenses are managed through the ‘Company License Pool’, which is accessible through the GRAPHISOFT ID website. The basic idea is that every company can have an admin (a GRAPHISOFT ID account with elevated rights), who has the authority to assign individual keys to individual members, or can set keys to be available to everyone. We have detailed guides about managing companies and managing licenses.

How can I get a Software Key?

The introduction of Software Key will take place gradually on different markets during the course of 2015. In the first phase, new license orders will be available with software keys, then the replacement of existing hardware keys will be possible for users on ArchiCAD 18. Contact your local ArchiCAD reseller to learn more about the availability of Software Keys in your region.

Can I borrow a license from a Software NET Key?

From ARCHICAD 19 on you can borrow licenses from a Software NET Key to another computer, but borrowing to a Hardware Key from a Software NET Key is not possible. See details of license borrowing here.

Software Key compatibility

See additional information about Software Based Protection key compatibility on the ARCHICAD Protection Key Compatibility site.

Additional Resources


ARCHICAD Start Edition

$
0
0
SE2016_Slider

ARCHICAD STAR(T) Edition (SE) is recommended for smaller architectural practices.

Based on the industry leading Virtual Building technology of ARCHICAD, its features have been tailored to the needs of smaller architectural practices. ARCHICAD STAR(T) Edition contains all the tools necessary to create the Virtual Building model from which the entire architectural documentation is derived. You can reach the comparison page of the latest version here.


File compatibility

File Open

With SE2006 SE2007 SE2008 SE2009 SE2010 SE2011 SE2012 SE2013 SE2014 SE2015
What
SE2015 (./)
SE2014 (./) (./)
SE2013 (./) (./) (./)
SE2012 (./) (./) (./) (./)
SE2011 (./) (./) (./) (./) (./)
SE2010 (./) (./) (./) (./) (./) (./)
SE2009 (./) (./) (./) (./) (./) (./) (./)
SE2008 (./) (./) (./) (./) (./) (./) (./) (./)
SE2007 (./) (./) (./) (./) (./) (./) (./) (./) (./)
SE2006 (./) (./) (./) (./) (./) (./) (./) (./) (./) (./)
ARCHICAD 19
ARCHICAD 18 x
ARCHICAD 17 x x
ARCHICAD 16 x x x
ARCHICAD 15 x x x x
ARCHICAD 14 x x x x x
ARCHICAD 13 x x x x x x
ARCHICAD 12 x x x x x x x
ARCHICAD 11 x x x x x x x x
ARCHICAD 10 x x x x x x x x
ARCHICAD 9 (./) (./) (./) (./) (./) (./) (./) (./) (./)
ARCHICAD 8.1 (./) (./) (./) (./) (./) (./) (./) (./) (./) (./)
ARCHICAD 8 (./) (./) (./) x x x x x x x


With AC8.1 AC9 AC10 AC11 AC12 AC13 AC14 AC15 AC16 AC17 AC18 AC19
What
SE2015 (./) (./)
SE2014 (./) (./) (./)
SE2013 (./) (./) (./) (./)
SE2012 (./) (./) (./) (./) (./)
SE2011 (./) (./) (./) (./) (./) (./)
SE2010 (./) (./) (./) (./) (./) (./) (./)
SE2009 (./) (./) (./) (./) (./) (./) (./) (./)
SE2008 (./) (./) (./) (./) (./) (./) (./) (./) (./)
SE2007 (./) (./) (./) (./) (./) (./) (./) (./) (./) (./) (./)
SE2006 (./) (./) (./) (./) (./) (./) (./) (./) (./) (./) (./) (./)
ARCHICAD 19 (./)
ARCHICAD 18 (./) (./)
ARCHICAD 17 (./) (./) (./)
ARCHICAD 16 (./) (./) (./) (./)
ARCHICAD 15 (./) (./) (./) (./) (./)
ARCHICAD 14 (./) (./) (./) (./) (./) (./)
ARCHICAD 13 (./) (./) (./) (./) (./) (./) (./)
ARCHICAD 12 (./) (./) (./) (./) (./) (./) (./) (./)
ARCHICAD 11 (./) (./) (./) (./) (./) (./) (./) (./) (./)
ARCHICAD 10 (./) (./) (./) (./) (./) (./) (./) (./) (./) (./)
ARCHICAD 9 (./) (./) (./) (./) (./) (./) (./) (./) (./) (./) (./)
ARCHICAD 8.1 (./) (./) (./) (./) (./) (./) (./) (./) (./) (./) (./) (./)
ARCHICAD 8 (./) (./) (./) (./) x x x x x x x x

File Save

With SE2006 SE2007 SE2008 SE2009 SE2010 SE2011 SE2012 SE2013 SE2014 SE2015
What
SE2015 (./)
SE2014 (./) x
SE2013 (./) x x
SE2012 (./) x x x
SE2011 (./) x x x x
SE2010 (./) x x x x x
SE2009 (./) x x x x x x
SE2008 (./) x x x x x x x
SE2007 (./) x x x x x x x x
SE2006 (./) x x x x x x x x x
ARCHICAD 19 x
ARCHICAD 18 x
ARCHICAD 17 x x
ARCHICAD 16 x x x
ARCHICAD 15 x x x x
ARCHICAD 14 x x x x x
ARCHICAD 13 x x x x x x
ARCHICAD 12 x x x x x x x
ARCHICAD 11 x x x x x x x x
ARCHICAD 10 x x x x x x x x
ARCHICAD 9 x x x x x x x x x
ARCHICAD 8.1 x x x x x x x x x x
ARCHICAD 8 x x x x x x x x x x

Some Antivirus Solutions May Dramatically Reduce the Performance of ARCHICAD

$
0
0

Affected version(s): ARCHICAD 18 and 19 | Severity: workaround applicable (see Solution)|

Issue
We have been reported many cases when ARCHICAD users experienced major slowdown of ARCHICAD 18 and 19. In many cases the slowness was not related to any specific operation. In other cases the program was unresponsive after start-up and yet in other cases teamwork related operations were significantly slower than normal.

Causes

Examining these cases we found that certain antivirus solutions are responsible for these performance issues.

Theoretically all antivirus applications can be problematic since they scan http based communication and most of ARCHICAD’s and BIM Server’s communication uses this protocol. In the problematic cases we have seen Bitdefender, AV Defender or F-secure were scanning this communication which lead to the slowness.

If the user experiences slowness during the opening it is possible that the antivirus holds curl.exe which is also an http client that plays a role in licensing.

Another type of problem is when the antivirus consumes most of the read/write capacity of the hard drive which may also result in slowness.

Solution

  • You need to carefully configure your antivirus solution.
  • Put ARCHICAD, BIM Server and the folders they use on the exceptions list of the antivirus.
  • Make sure that network ports used by BIM Server are not scanned by the antivirus.


BIMx Known Issues

$
0
0

Autotexts are the same on every layout in the BIMx hypermodel

{i} Note: Fixed in ARCHICAD 18 Update Build 9013.

Affected version(s): ARCHICAD 18 or older| Severity: workaround applicable | ID: 201051

Issue

Every Layout’s autotext in the BIMx hypermodel will have the data of the Layout which was exported first if the Autotext is contained in a Drawing placed on the Layout.

Cause

During the saving process of the BIMx hypermodel, ARCHICAD modifies the Autotexts (incorrectly) therefore every Autotext will inherit it’s content from the first Layout. This happens only if the Drawings which contain the Autotexts on the Layouts are Stored in the Project file.

Workaround 1

Place the autotext on the Layout Masters  instead of placing a Drawing on each Layout which contains the Autotexts.

Workaround 2

In the Drawing’s settings dialog the ‘Store Drawing in the Project file’ checkbox have to be unticked for the time of the Publishing.

drawing stored in project


Error when exporting the 3D data to BIMx hypermodel

{i} Fixed in ARCHICAD 19 Update Build 5005

Issue

When exporting (publishing or uploading) a BIMx hypermodel, the publisher may not be able to save the 3D data of the hypermodel.

3d export failed

Cause

The problem is that either the user’s Operating System login name or the publishing path contains double byte characters (eg. japanese, chinese ).

Workaround

The workaround for the problem is to either use an Operating System login name with only latin characters in it and choosing an export path that also contains only latin characters.


Cursor Disappears in BIMx While Saving

{i} Fixed in ARCHICAD 18 Update Build 5100

The mouse and cursor disappears in the Save BIMx Model dialogue box. It is impossible to select the destination of the file in the appropriate field. The keyboard TAB can only switch between the fields “Save As” and “Tags”.

The issue occurs when:

  • opening BIMx from ArchiCAD
  • opening BIMx independently of ArchiCAD.

on OSX 10.10 with BIMx 17 and 18.

You can save your file to the default folder by hitting Enter, then you can move your file to the desired destination.

Workaround: switch to another application by using Command+TAB on your keybord then switch back to BIMx, you will find the cursor reappear.


File upload to the BIMx Model Transfer Site

Uploading BIMx Hyper-model from ArchiCAD

Network Error

network error ArchiCAD couldn’t submit the dongle number and used BIMx account you signed in with to the BIMx Cloud database. This could either be caused by:

  • a connection issue to GRAPHISOFT’s servers from your ArchiCAD client because of network restrictions, or
  • a malfunction at the server side not allowing the ArchiCAD client to join.

If the issue can’t be resolved by adjusting the Firewall/Antivirus software settings please send an email to BIMx Technical Support with the following information:

  • what is the exact issue (uploading from ArchiCAD or from BIMx Desktop, the error message you get)
  • your BIMx email address
  • your keyplug number (green WIBU or silver CodeMeter key)
  • the ArchiCAD Fastlogger files

Uploader is unable to connect to GRAPHISOFT. Can’t access upload location

After publishing the 3D view(s) and layouts of the BIMx Hyper-model, the BIMx Uploader Application can display these errors: uploader is unable to connect to graphisoft cant access upload location_ Such error messages are displayed when the BIMx Uploader app is unable to upload the BIMx file to the chosen upload location. Most probably the chosen location is a Private Folder and the Uploader application doesn’t get permission to upload the file there. Publication to Private folders is only available for Clients with an Active SSA (Software Services Agreement) subscription. If you believe you are on this subscription please report the issue to BIMx Technical Support with the following information:
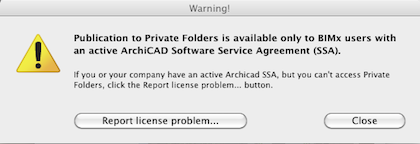
  • what is the exact issue (uploading from ArchiCAD or from BIMx Desktop, the error message you get)
  • your BIMx email address
  • your keyplug number (green WIBU or silver CodeMeter key)
  • the log files of the BIMx Uploader application.

As a workaround you can try uploading the model publicly, or use an alternative file transfer option for iOS or Android devices.

Uploading BIMx 3D file from BIMx Desktop

Network Error

network error BIMx Desktop couldn’t submit the dongle number and used BIMx account you signed in with to the BIMx Cloud database. This could either be caused by:

  • a connection issue to GRAPHISOFT’s servers from your ArchiCAD client because of network restrictions, or
  • a malfunction at the server side not allowing the ArchiCAD client to join.

If the issue can’t be resolved by adjusting the Firewall/Antivirus software settings please send an email to BIMx Technical Support with the following information:

  • what is the exact issue (uploading from ArchiCAD or from BIMx Desktop, the error message you get)
  • your BIMx email address
  • your keyplug number (green WIBU or silver CodeMeter key)
  • the “BIMx_Log.txt” and “Engine_Log.txt” files from the Users/username/Documents/BIMx folder

Upload to private folder only works with SSA

publication to private folders is only available for customers with SSA Selecting the option Upload to a Private Folder results in this dialogue if you don’t have an Active SSA (Software Services Agreement) subscription, as this premium functionality is only available for them. If you believe you have an Active SSA subscription please report the issue with the Report license problem button.


BIMx 16 doesn’t respond on Yosemite.

BIMx 16 not being usable on Yosemite, no menus or keyboard commands appear, or even scrolling is not possible.

Workaround: left-click the mouse button on the screen (the BIMx model screen) then click Esc, the Esc button now works and so do all the other keys that had been unusable before.


BIMx Desktop App/Viewer

BIMx doesn’t start

If BIMx Desktop version crashes at startup, shows only a black screen, a black screen with red lines or you see other display issues its most possibly related to your Video Card or its Driver. Make sure you have the latest driver installed for your card that supports OpenGL 2.0. In case device manager indicates Generic SVGA driver you should search for a driver written directly for your card.

Here you can find the latest drivers for the popular cards:

{i} Based on our experiences uninstalling the existing driver and installing the latest one usually solves most of the display issues. /!\ Some old graphics cards may not be able to show the model in BIMx even with the latest released driver, these are mostly really old and low performance cards. Many computers with integrated Intel graphics are affected as well.


BIMx crashes at start via Remote Desktop

Running BIMx via Remote Desktop may fail because of the limitations of redirecting the OpenGL technology to the other machine. Read more about this here. BIMx can be started only from a local profile and then joining in via remote session will be able to transfer the image of the running application from that point. It is advised to run BIMx in windowed mode in such cases.


Issue on Mac with virtualised operating systems

Running BIMx may fail in virtualised environments (such as Parallel Desktop/VMware Fusion). In some cases it works but global illumination render fails. {i} Running BIMx in a virtual machine is not recommended because BIMx is using the video card in OpenGL mode. The problem itself might also be related to the ATI Mobility Radeon video cards that are used in Macbook laptops, although this has been seen on a Mac Pro system with a desktop ATI card as well.


File error

File error message pops up if the opened file is damaged or if was saved with a newer version of ArchiCAD than the BIMx Application. error.png


Unsupported BIMx file

BIMx 17 Desktop application can’t open BIMx Hyper-models, these files can be opened with BIMx 18 Desktop app or newer and with the Android and iOS mobile BIMx apps. Unsupported file type


Save and Share to BIMx Model Transfer Site buttons are greyed out

If the BIMx Desktop Application doesn’t find a license it starts in Viewer mode. This result in that the “Save” and “Share BIMx Model” buttons  are greyed as these options are not availabe without a license. save and share greyed out If you have a BIMx license (BIMx license is integrated into the ArchiCAD license from version 17) make sure that it is accessible for BIMx.


alt text

Pixelated shadows

In some cases the shadows might be pixelated. This is usually caused by large polygon number elements, such as trees and other plants. Their detailed shadow fills up the shadow map and this results low-res shadows. A couple of ideas that might help to fix the representation:

  • hide the layer of these elements
  • use the marquee tool to only represent a part of the model
  • use lower polygon number elements

alpha channel transparency

Invisible textures

Textures with alpha channel transparency are invisible in the case they are viewed through another transparent surface.

ARCHICAD STAR(T) Edition 2016

$
0
0

See also: StartEdition

ARCHICAD STAR(T) Edition 2016 was released on January 12, 2016. Based on the industry-leading Virtual Building technology of ARCHICAD 19, ARCHICAD STAR(T) Edition 2016 introduces a wide array of modeling and productivity improvements focusing on the most requested customer wishes. ARCHICAD STAR(T) EDITION 2016 provides the full power of ARCHICAD 19’s BIM-based streamlined documentation workflow, allowing the model to stay live until the very end of the project: it helps keep architects in the state of the creative design flow with as little disruption as possible.

By extending its robust 64-bit and multi-processing technologies with Background Processing, an industry-first in BIM, ARCHICAD takes the next quantum leap in BIM Performance. As a result, ARCHICAD STAR(T) EDITION now offers lightning-fast response times, making it the undisputed speed leader in the BIM business, offering users a uniquely responsive, fluid work environment, saving a considerable amount of time and effort during their everyday tasks.


Compatibility

STAR(T) Edition 2015 supports the following operating systems:

*Suitable for running ARCHICAD STAR(T) Edition 2016, but not tested by GRAPHISOFT.

 Can read files created with:

  • STAR(T) Edition 2006 or newer versions
  • ARCHICAD 8.1 and 9

START(T) Edition 2016 files can be opened with:

START(T) Edition 2016 protection key:

  • You can use Start Edition with a dongle which has full ARCHICAD license on.

Version Comparison

Check the new features comparison chart to see the differences between ARCHICAD 19 Full and StartEdition versions: Version Comparison


New Features in STAR(T) Edition 2016

ARCHICAD 19’s Simultaneous Element Editing skills, Smart Attribute handling and other modeling functions, OPEN collaboration with BCF format support, overall Performance Improvements and the full range of sophisticated 2D / 3D editing enhancements – and many more – make ARCHICAD STAR(T) Edition 2016 the ideal tool of a broad user community. The full feature set makes the STAR(T) Edition 2016 workflow a very smooth one from the very first mass study, right up to the final documentation phase.

performance Background Processing
ARCHICAD STAR(T) Edition takes advantage of unused computer capacity by anticipating potential future user actions and preparing for them in the background. This greatly increases the overall responsiveness of the application, so it feels more agile with projects of any type or size. The dramatic difference between GRAPHISOFT’s next-gen technology and standard BIM software can be best witnessed when returning to one’s previous BIM software without background processing.
opengl Smoother, Faster 3D Navigation with OpenGL
STAR(T) 2016 uses a fully-optimized OpenGL engine ensuring a smooth, lightning-fast 3D navigation, even when working with extremely large building models. We know that architects like to use ARCHICAD’s 3D model window for informal client presentations. This model window uses the so-called “OpenGL” engine. And because STAR(T) uses a fully optimized OpenGL engine, you’ll get smoother, faster 3D navigation, free from flickering—even with extremely large models.
tabs Improved Work Environment
The new Tab Bar for multiple viewpoints allows speedier switching among Floor Plans, Sections, Elevations, and 3D windows. This makes accessing different views and overseeing BIM projects much easier. Plus, true full-screen mode makes STAR(T) 2016 feel like the most natural BIM application on the Mac.
wysiwyg PDF Improvements
By implementing a truly WYSIWYG – “what you see is what you get” – solution for saving PDF files in ARCHICAD STAR(T) Edition 2016, we ensure that only the visible layers will be included in the created PDF, and the exported layers can later be switched on and off in the PDF viewer.
intuitiveness Intuitiveness
Brand new Guide Lines, Snap Guides and Snap Points provide permanent graphical aid for accurate element creation and editing. Listing enhancements help users accurately schedule the area of any skins from composite structures by listing skin areas in interactive schedules. Annotation improvements like the Pointer for Dimension Texts and Automatic Labels help ease the tedious work of documentation.
ac19-caption-openbim Leading the Way in OPEN BIM
ARCHICAD STAR(T) Edition 2016 supports highly iterative coordination with engineers and consultants and delivers several IFC-related improvements.STAR(T) 2016 allows users to import the IFC model exactly as it looked in the original application in which it was created: “perfect geometry, minimal attributes.”IFC Spaces will always be converted to editable ARCHICAD Zones by retaining their original geometries; ability to override materials and representation styles of IFC model elements; IFC data mapping with library part independent GDL parameters; customizable property update function; and faster IFC data handling in IFC Manager.Collision detection now works with all imported IFC MEP elements as well. Improved collision detection performance makes STAR(T) 2016 a unique BIM authoring tool with full-fledged interdisciplinary coordination capabilities.
ac19-caption-surface Surface Painter
ARCHICAD STAR(T) Edition 2016 enables intuitive, drag-and-drop editing of the building model surfaces in 3D -providing instant visual feedback.Creative design is instantaneous and may also be truly impressive during client presentations. Intuitive drag-and-drop building model surface editing in 3D provides instant visual feedback. SE 2016’s new Surface Painter lets designers change model surfaces in the 3D window with a single click, using a floating palette.

Windows 10

$
0
0

windows 10 GRAPHISOFT had been testing Windows 10 beta and is continuously testing the final released version. We have found Windows 10 to be compatible with our current products. Any known issues found so far and to be found in the future will be published under the Known Issues section below.

Version compatibility:

ARCHICAD:

  • v18 and newer: Compatible&Supported (Updates released to fix new compatibility issues)
  • v15-17: Compatible (Updates are not released to fix new compatibility issues)
  • v13-14: Not Compatible (if QuickTime is not installed)
  • v12 and older: Not Compatible
  • File converter versions: Compatible for converting files if QuickTime is installed

ARCHICAD STAR(T) Edition:

  • 2010-2016: Compatible
  • 2008-2009: Not compatible

Compatible: all features of the respective ARCHICAD version are supported by the Operating System.
Not Compatible: the ARCHICAD version does not run on the Operating System.

Windows 10 branches, editions:

Microsoft has changed how updates and upgrades are rolled out for the operating system. Four branches have been created to differentiate when a new features are rolled out to the Windows users. GRAPHISOFT recommends Current Branch or Current Branch for Business to be used with ARCHICAD.

  • Supported branches: Current Branch, Current Branch for Business, Long Term Servicing Branch
  • Not supported branch: Windows Insider Preview Branch

GRAPHISOFT products are supported on Pro and Enterprise editions and are compatible with Home and Educational editions.

Upgrade checklist

  • Study  Windows 10 articles for any known issues, difficulties
  • Back up all of your data, including ArchiCAD / BIM Server specific data before upgrading the operating system. When switching from 32-bit to 64-bit, you need to perform a clean install of Windows. This means that you have to re-install all your software applications and migrate all your data after installing the system.
  • Upload all Software keys to the License Pool
  • Return all borrowed licenses before upgrading the OS
  • Allow yourself enough time for the upgrade, do not upgrade the OS close to a deadline
  • Install/update Windows.
  • Install ArchiCAD. Your ArchiCAD install DVD includes both 32-bit and 64-bit version of ArchiCAD, and the correct version will automatically selected when you run the automated installer wizard.
  • Install all updates for the new operating system
  • Install all updates for GRAPHISOFT products
  • Install the Windows 10 compatible protection key driver
  • Test ArchiCAD and the BIM Server

Known issues

Error message appears when installing ARCHICAD 18 or ARCHICAD 19 to Windows 10 N and KN editions

Affected versions: ARCHICAD 18 and ARCHICAD 19| Severity: workaround applicable

Error message 18

Issue:

The GXMedia.dll can’t run because the Windows Media Feature Pack is not installed on Windows N and KN version by default.

Workaround:

Make sure you confirm your OS Build number before going ahead with the below steps (OS Build number can be found under Settings – System – About)

  • Windows 10 Enterprise Build 10586.71 (Released in November 2015): Download and install the Windows Media Feature Pack from the Microsoft website before installing ARCHICAD.
  • Windows 10 Enterprise Build 10240 (Original release – July 2015): Download and install Windows Media Feature Pack from the Microsoft website before installing ARCHICAD.

The Media Feature pack is necessary to install and to run certain functions of ARCHICAD. In ARCHICAD 20 we will add more information to the error message so users could reach the corresponding Microsoft site more easily where they can download the Windows Media Feature Pack.

BIMcloud Manager’s web interface cannot be opened with Microsoft Edge, installation can’t be completed

Affected versions: BIM Server and BIMcloud web interface| Severity: workaround applicable

Issue:

During the configuration process of BIM Server and BIMcloud, the installer opens the default web browser, and on Windows 10 with the default settings Microsoft Edge opens, which can’t recognize the http://127.0.0.1:port address therefore the installation can’t be finished. The browser also can’t recognize Fully Qualified Domain Name address (http://FQDN:port) or the http://Computer name:port.

Screen Shot 2015-07-31 at 10.17.32

Workaround:

Use another web browser or type http://localhost:port to the browser’s address bar instead of the IP, FQDN or computer name.

Unable to shrink the open-save dialog on Windows 10

Affected versions: 17 and newer| Severity: there is no workaround

Open and Save dialogs can’t be shrunk on Windows 10 platform. If you accidentally double click on the header and the dialog becomes full screen, it can’t be reset to default, not even with a preferences cleaning.

Shadows under windows effect is disabled by ARCHICAD

Affected versions: 18 and 19 | Severity: workaround applicable (fixed in AC18 Update 7007 and AC19 Update 5005)

01

Issue:

When one starts ARCHICAD 19 on Windows 10 Operating System, shadows under windows effect is switched off. This effect is the only thing that divides the windows, so the same colored ones can fuze with each other.
Shutting down ARCHICAD doesn’t solve the issue, the shadows will appear again just after Log off/on.

Workaround:

After starting ARCHICAD, switch off the shadow application, then switch on again.
– Open Control Panel > System and Security > System > Advanced system settings;
– (Alternatively you can use the Start Menu and search for „Advanced system settings”);
– Advanced tab > Performance > Settings;
– Here check „Show shadows under windows” and click OK.

02

Viewing all 1140 articles
Browse latest View live


<script src="https://jsc.adskeeper.com/r/s/rssing.com.1596347.js" async> </script>